Making pad thai on the Blackstone pushed me outside my comfort zone, and I’m glad it did. We bought ingredients we had never cooked with, made the sauce from scratch, and ended up with a chicken and shrimp noodle dish that I absolutely want to make again.
I’m already a noodle guy. Give me lo mein over rice most days, especially when we’re cooking on a griddle. But pad thai was new territory for us. What won me over was that balance of sweet, sour, savory, and a little heat without the noodles swimming in sauce.
The biggest discovery? Tamarind, fish sauce, and palm sugar make an incredible sauce with very little fuss once the tamarind is ready. The ingredient shopping took us farther outside our usual routine than mixing the sauce did.
Understanding the Dish Before Firing Up the Griddle
If I’m going to cook something unfamiliar, I want to understand what I’m aiming for. That meant doing some research, taking a little date with Amy to our local Asian market, and picking up restaurant pad thai for a flavor reference.
We also bought a ready-made noodle kit and a jar of pad thai sauce. Not because there’s anything wrong with taking a shortcut, but because we wanted to know how those options compared before building our own version.
The restaurant dish gave us a useful starting point: lightly coated noodles, chopped peanuts, plenty of bean sprouts, lime, sweetness, and a comfortable level of heat. I ordered level three spicy. Amy would have preferred level zero, but even she enjoyed it.
That tasting helped us focus on the whole bite rather than just making a sauce that tasted good in a bowl. The noodles, crunchy toppings, protein, and citrus all needed to work together.
Ingredients for Our Chicken and Shrimp Pad Thai
Our Asian market had a much wider selection of the specialty ingredients than our regular grocery store. Here’s what we used for this Blackstone pad thai:
- Rice noodles: We used flat rice noodles labeled linguine, not wheat linguine.
- Boneless, skinless chicken thighs: Sliced into small, manageable pieces.
- Fresh shrimp: Some chopped to distribute through the noodles and some left whole for serving.
- Dried shrimp: Finely chopped for another layer of shrimp flavor.
- Eggs: Beaten before heading to the griddle.
- Shallot, garlic, and green onions: With the green onion tops reserved for the end.
- Bean sprouts: Cooked into the noodle mixture.
- Chopped peanuts: Some cooked into the dish and the rest used on top.
- Cilantro and lime: For a fresh finish.
- Oil: Added in light coatings as needed during cooking.
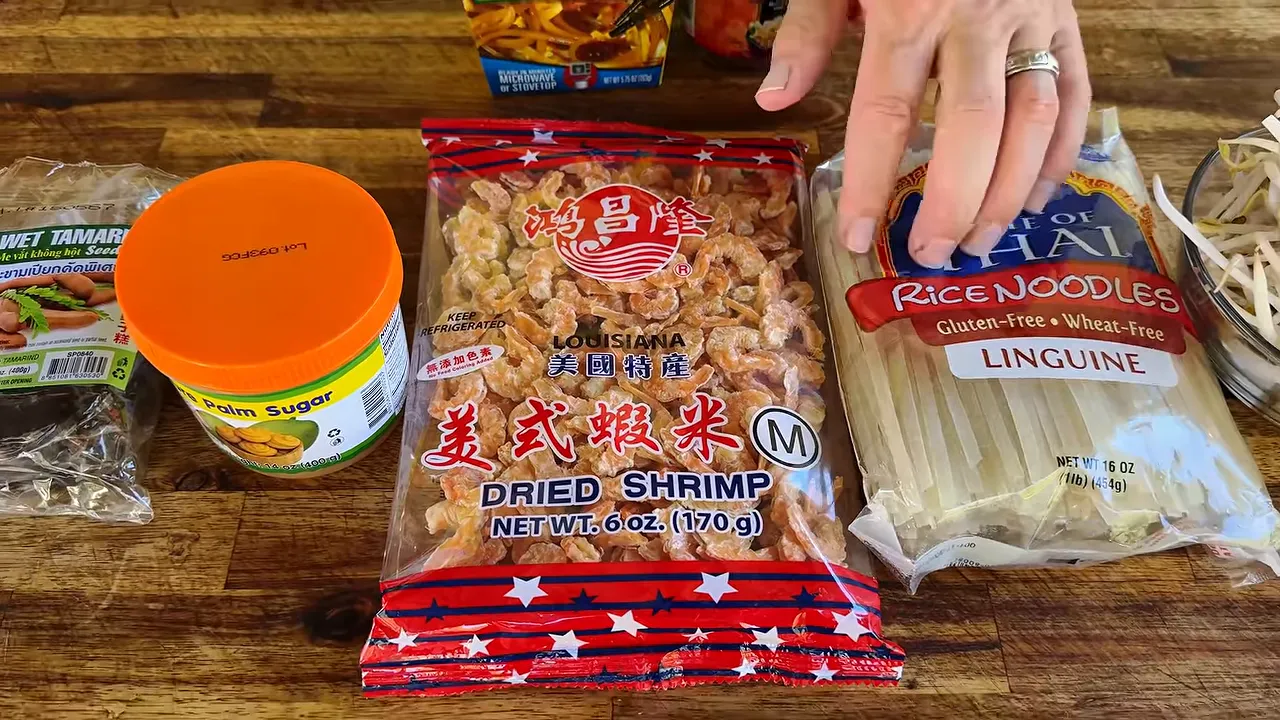
The sauce uses prepared tamarind pulp, fish sauce, palm sugar, red chili flakes, and sriracha. I’ve included our sauce measurements below; the complete measured pad thai recipe is available on our website.
A few ingredient choices worth understanding
Tamarind was the ingredient I most wanted to get right. It comes from a fruit, and its smell, appearance, and flavor are three very different experiences. The block reminded me of raisins, but the prepared pulp tasted bright and tart, almost lime-like, with a little plum or raisin character behind it. That’s a flavor description, not an indication that it contains citrus.
If you think you’ve never had tamarind, you might recognize it from Worcestershire sauce. It wasn’t as unfamiliar as I first thought.
Our palm sugar came as a soft paste rather than loose granules. Brown sugar is a practical substitute for palm sugar. Rice wine vinegar can provide sourness if you can’t get tamarind, although it won’t reproduce tamarind’s particular flavor. For this first attempt, we wanted to work with the tamarind itself.
Dried shrimp was another ingredient we don’t normally use. Chopping it finely helps spread that concentrated flavor through the noodles. If you leave it out, finely chopped fresh shrimp can still help distribute shrimp flavor, although the two ingredients aren’t identical.
How to Prepare Tamarind Pulp From a Block
Start the tamarind first, because it needs 20 to 30 minutes to soften. That gives you time to slice the protein and prepare everything else.
- Break a portion of the wet tamarind block into small pieces and place them in a heatproof bowl.
- Pour very hot, freshly boiled water over the pieces to loosen them.
- Let the tamarind soak for 20 to 30 minutes.
- Once the mixture is cool enough to handle safely, work the softened pieces apart to separate the pulp from the fibers.
- Press the mixture through a fine-mesh strainer into a clean bowl.
- Scrape the smooth pulp from the underside of the strainer and discard the fibrous material left inside.
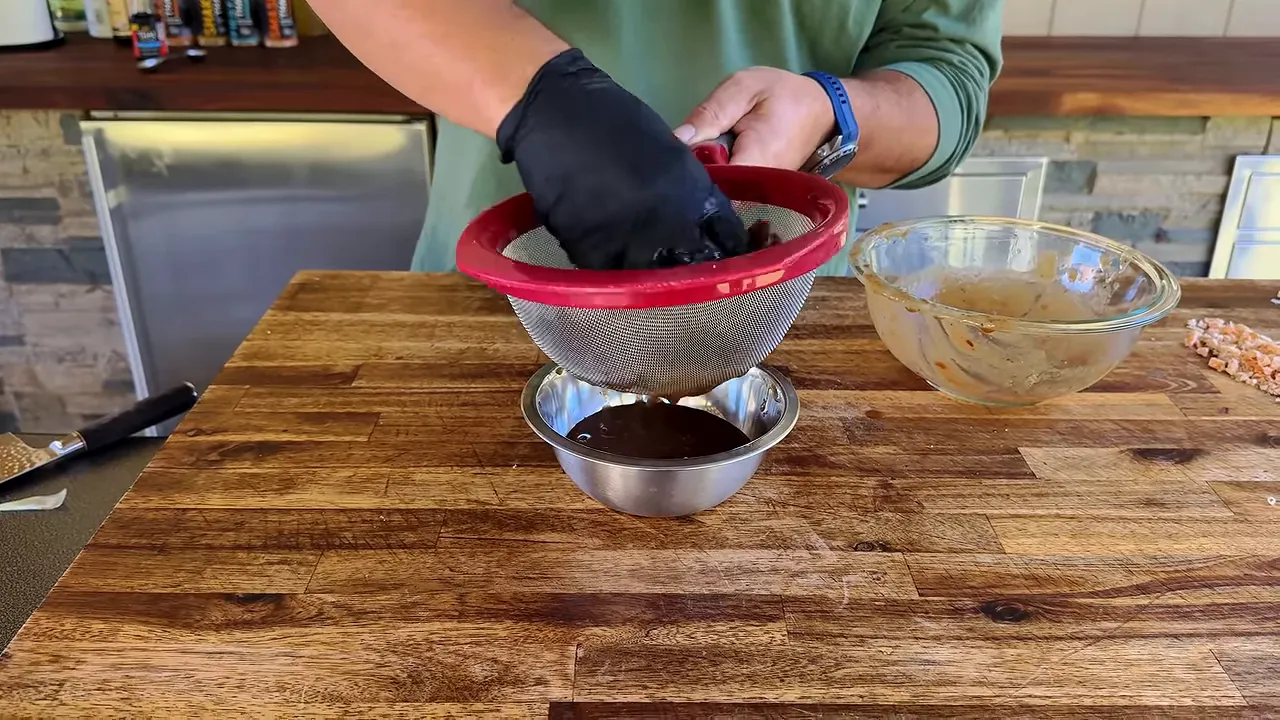
Even a block labeled seedless can contain plenty of fibers. Those are what you’re trying to remove. If the mixture needs loosening, add a little more hot water, but don’t put your hand back into it until it has cooled safely.
Our base sauce needs only 2 tablespoons of this prepared pulp, so there’s no need to break down the entire block for one batch.
Our Simple Homemade Pad Thai Sauce
Amy suggested equal measurements for the three main ingredients. I argued with her about it. Then I tasted it, and, well, she was right.
The starting ratio is easy to remember: 2, 2, and 2.
- 2 tablespoons prepared, strained tamarind pulp
- 2 tablespoons fish sauce
- 2 tablespoons palm sugar
- About 1/8 teaspoon red chili flakes
- About 1 teaspoon sriracha
Mix the tamarind, fish sauce, and palm sugar until combined, working the sugar into the liquid. Add the chili flakes and sriracha, then taste.
Those first three ingredients were fantastic together before we added anything else. The sriracha gave it another little push, and Amy actually preferred it with the sriracha mixed in.
This was a restrained amount of heat for us. If I were making it only for myself, I’d add more. Adjust that part to suit the people eating it rather than assuming everyone wants the same spice level.
Stir the sauce again immediately before pouring it onto the noodles. Our palm sugar settled toward the bottom as it sat, a little like a cornstarch slurry. You don’t want the sweet part staying behind in the bowl.
I doubled the sauce because I also cooked extra chicken and shrimp. That was for a separate protein-heavy plate, not because I wanted to drown the noodles.
Prep Everything Before You Start Cooking
This dish has several additions, and the griddle portion moves along quickly. Get the chopping and mixing done first.
For the noodle batch, I started with two boneless, skinless chicken thighs and about six fresh shrimp. I left the thigh fat in place for flavor and sliced the meat into small pieces. Three shrimp were chopped finely, and three stayed whole for the finished plates.
The idea behind chopping some shrimp is simple: instead of getting shrimp flavor only when you happen to bite into a whole shrimp, you get little pieces throughout the noodles.
Beat the eggs, slice the shallot, chop the garlic, crush the peanuts, and separate the green onion whites from the tops. Finely chop the dried shrimp, too. We used about 2 tablespoons of that chopped dried shrimp during cooking.
Prepare and drain the rice noodles before they go onto the flat top, following the package directions for your particular noodles. Don’t assume every rice noodle needs the same preparation.
After handling raw chicken and shrimp, clean and sanitize your work area and utensils. For a useful safety reference, FoodSafety.gov’s minimum cooking temperature guide lists chicken at 165°F and shrimp as pearly or white and opaque.
How to Cook Pad Thai on the Blackstone
1. Set up a warmer protein zone and a cooler noodle zone
I did not turn every burner up and hope for the best. We used a combination of off, low, and medium settings to create different cooking areas.
On my Blackstone, the center tends to run hotter. Keep that in mind when choosing where the noodles will sit. The noodles need a gentler area than the one you use to get the chicken started. An off burner can still have a warm surface above it because heat travels from the neighboring burners.
2. Start the chicken, then add the fresh shrimp
Add just enough oil to get the chicken cooking on the warmer section. Spread the pieces out and turn them as they cook.
Add the fresh shrimp separately so you can manage their cooking without treating them exactly like the chicken. Keep the whole shrimp aside for topping the plates, and work the chopped fresh shrimp into the dish as the cook progresses.
3. Add the noodles and build an aromatic center
Lightly oil the cooler noodle area and add the prepared, drained rice noodles. Make a small well in the center, add a little oil, and put the shallot, green onion whites, and garlic into that space.
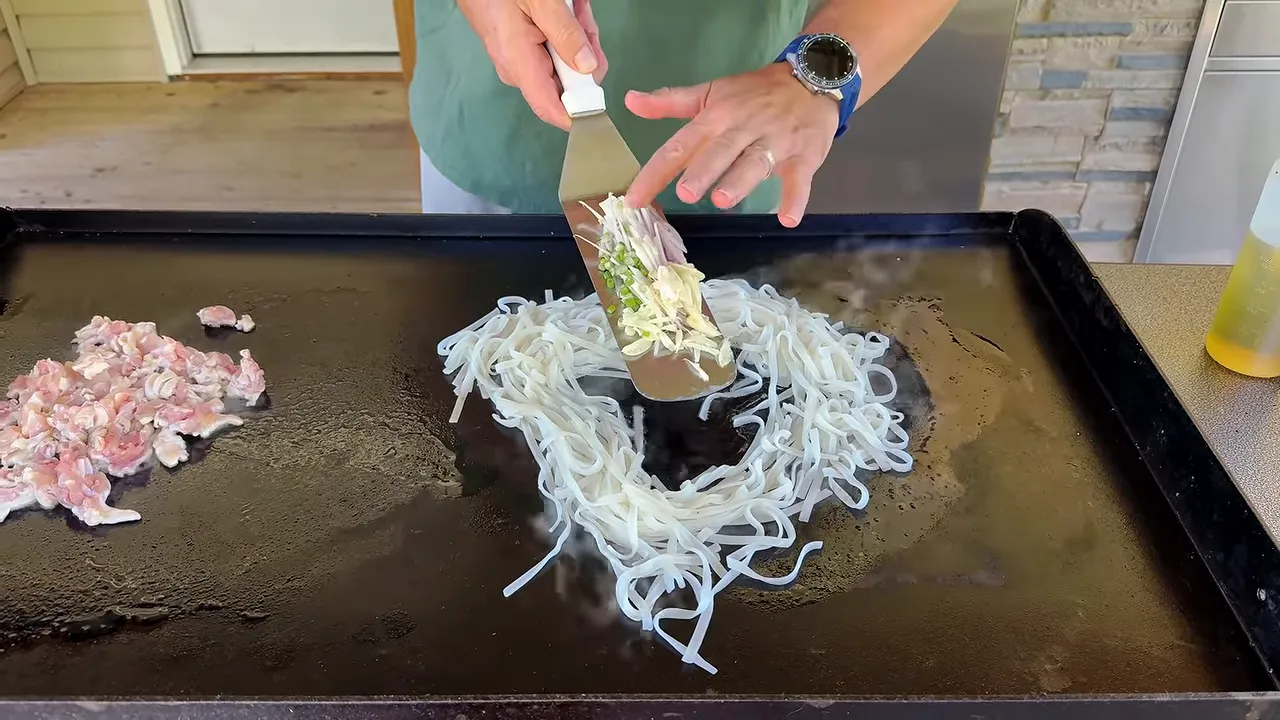
Let those aromatics get started, then work them through the noodles. Use your spatulas to lift and fold the strands. I liked the little browned spots that developed, but the goal wasn’t to scorch the noodles.
Combine the cooked chicken with the noodles as it becomes ready.
4. Work in the dried shrimp and bean sprouts
Sprinkle about 2 tablespoons of finely chopped dried shrimp over the noodles. Put the bean sprouts down alongside the pile to get them started, then fold them into the mixture.
At this point, you’re spreading all those little flavor components through the dish rather than leaving them in separate pockets.
5. Cook the eggs partly on the noodles and partly beside them
Add a light coating of oil to an open section of the griddle. Pour a little of the beaten egg directly onto the noodles, then pour the rest onto the open surface.
Scramble and chop the egg on the griddle, then fold it through the noodle mixture. It’s a similar approach to the way I like to handle eggs in fried rice.
6. Add half the peanuts, then the sauce
Work about half the chopped peanuts into the noodles just before adding the sauce. Giving them a little time on the hot surface helps bring their flavor into the mixture.
Stir the sauce well, pour it over the noodles, and lift and fold until everything is evenly coated.
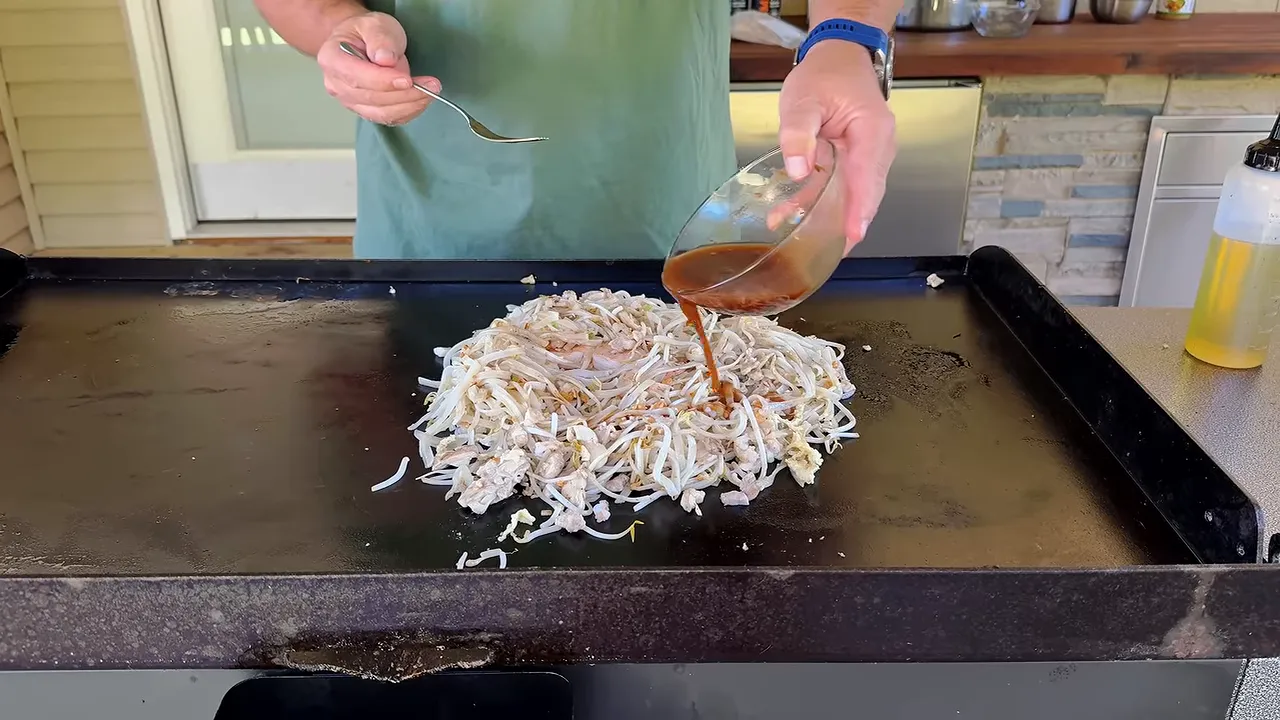
This is where the dish really changes. The sauce brings the noodles, chicken, shrimp, eggs, and vegetables together. You’re looking for coated noodles, not a puddle of sauce underneath them.
7. Finish with green onion tops, cilantro, peanuts, and lime
Add the green onion tops right at the end. I also added cilantro because I love it.
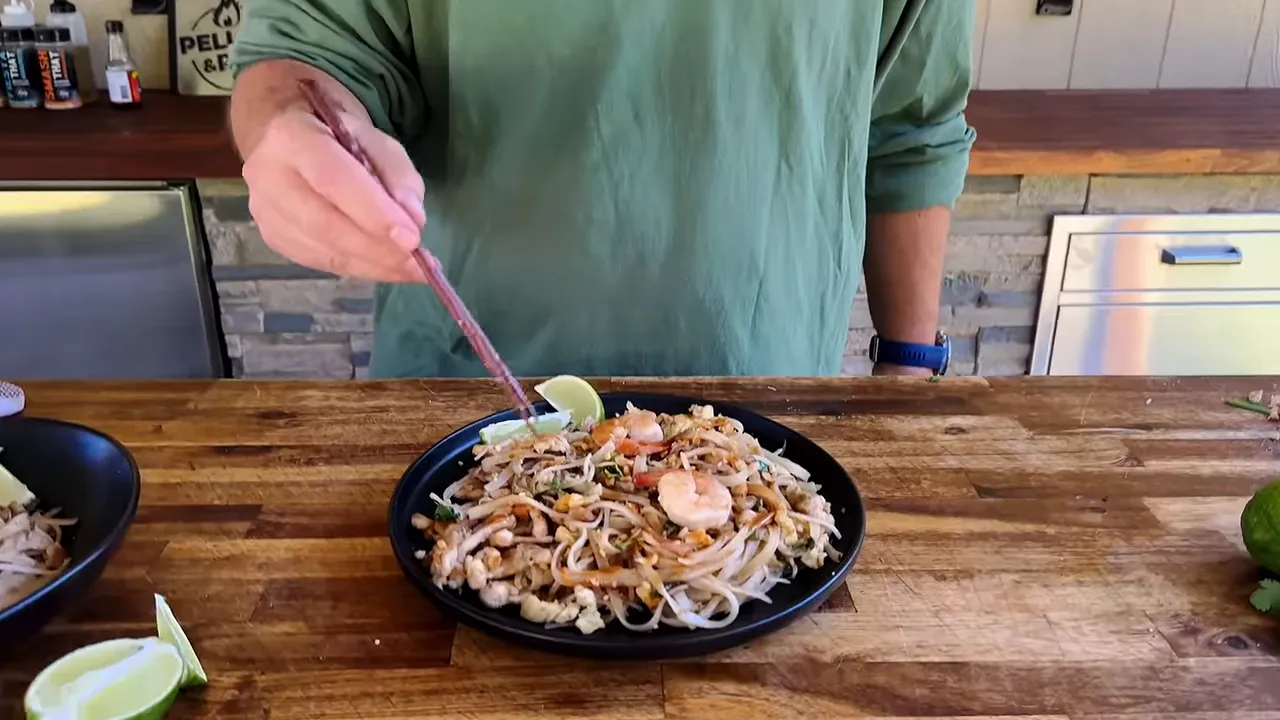
Plate the noodles, arrange the whole shrimp on top, and finish with the remaining peanuts and a lime wedge. And use that lime. What’s the point of putting it on the plate if you don’t squeeze it over the food?
How the Homemade Version Compared
The ready-made noodle kit was sweeter than the restaurant dish and had a little kick, but I was glad it hadn’t been my first introduction to pad thai. The color was in the neighborhood; the eating experience wasn’t as convincing to me.
The jarred sauce was a more promising shortcut. It cost around $10 for the container we bought, and I thought it could get fairly close once you added the other ingredients. Its ingredient list included sugar, fish sauce, rice wine vinegar, and tomato paste.
There’s nothing wrong with wanting to buy the sauce and skip some prep. But making our own gave us control over the sweetness, sourness, and heat, and we knew exactly what went into it.
Our homemade pad thai tasted a little sweeter than the restaurant version, and I would have liked more spice. Amy was happy with the milder approach. We also noticed ours wasn’t as pink or red. The jarred sauce contained tomato paste; our homemade sauce didn’t. That explains a difference between those sauces, but we couldn’t know exactly what the restaurant used.
What about using the sauce on extra protein?
I cooked the rest of the chicken and the remaining shrimp separately, bringing our total protein for the whole cook to five thighs and a pound of shrimp. I coated that extra batch with more pad thai sauce and warmed a little additional sauce in a small pan for drizzling over the noodles.
The extra chicken and shrimp were good, but the sauce tasted lighter on them than it did in the complete noodle dish. The noodles did a really good job of holding onto the sauce. That was a useful reminder that the full combination matters.
Was Making Pad Thai From Scratch Worth It?
Absolutely. This is the kind of cooking that makes me want to keep learning: a dish I’d never made, ingredients I’d never bought, and a result that made all that effort worthwhile.
I’m not claiming there’s only one correct pad thai recipe. We found variations in the sauce ratios and ingredients while researching it. This is our version, built with care and cooked on the Blackstone, and we were extremely pleased with it.
Get the tamarind ready first, keep your prep organized, give the noodles a cooler cooking area, and stir that sauce before it hits the griddle. Then bring everything together and taste the whole bite. Man, that’s some good griddle cooking.


