A pre-seasoned Blackstone? That was enough to get my attention.
I had been wanting to replace my Blackstone Bronco series for a while. I originally tried to buy a three-burner directly from Blackstone, but then we walked into Costco and found this four-burner Blackstone Omnivore Blackout Edition. I liked the looks of it, and the factory-seasoned cooking surface gave me a good reason to bring it home.
This is not a long-term review or a rundown of every specification. I wanted to answer one practical question: Can you clean this pre-seasoned Blackstone and cook a good meal without adding any seasoning first?
So that is exactly what we did. Bacon, homemade pancakes, and eggs. No extra seasoning rounds before breakfast, and no special treatment to help it pass.
Key Takeaways
- The factory-seasoned surface handled bacon, pancakes, and eggs without any additional seasoning rounds before cooking.
- A thin layer of cooking fat would likely improve bacon release on the first cook.
- Extended heating on low produced roughly 400°F edges and a hotter center near 450°F.
- Pre-seasoning removes an initial task, but regular cleaning, drying, and surface protection still matter.
What Pre-Seasoned Actually Means
I have always believed you ought to put your success in your own hands instead of depending entirely on a company to do it for you. But I also recognize that other companies have made pre-seasoned griddles that work well. There is no reason Blackstone cannot do the same.
For a beginner, the initial seasoning process can feel like a whole project before you ever get to cook. A good factory seasoning takes that first hurdle out of the equation.
Here is the important distinction: pre-seasoned does not mean maintenance-free, and it does not mean you will never need to season again. It means the cooking surface arrives with a starting layer of seasoning rather than leaving that entire job to you.
Seasoning and cooking oil also serve different purposes. The seasoning is the layer built onto the metal; a little fat during cooking helps food release. For more background on that distinction, Lodge has a useful explanation of how cookware seasoning works.
I know how to season a griddle. That was not the test. The test was whether somebody buying this Blackstone could reasonably trust that ready-to-cook promise.
Build Quality and Features That Caught My Attention
The Costco griddle we bought is part of the Patio Collection. I cannot confirm whether this exact package is a Costco exclusive or where it falls in Blackstone's full product history. What I can tell you is that I enjoyed putting this one together.
The parts felt substantial, and the finished unit had some beef behind it. Assembly was pretty straightforward. The one shelf issue I ran into was my fault for not reading carefully, not a problem with the instructions.
Our package included both a hood and a separate griddle cover. The hood has an X-shaped brace underneath to help resist misshaping. I removed the hood for the cooking demonstration, but it absolutely comes with one.
Other features include:
- Four independently controlled burners.
- Fold-down side shelves.
- A cushioned grip on the side handle.
- A paper towel holder and a trash bag holder.
- A front storage bin for things like oil bottles.
- A perforated bottom shelf.
- A bottle opener, because apparently we cannot leave that out.
The Folding Shelf Is a Bigger Deal Than It Sounds
One of my pet peeves is a griddle with a fixed shelf that keeps the whole unit wide even when you put it away. I move grills and griddles around a lot, and sometimes I take a propane tank off one cooker to use on another.
On this model, the shelf on the propane-tank side still folds down with the tank in place. That is a useful detail. You can reduce the storage footprint without being stuck with a permanently extended shelf.
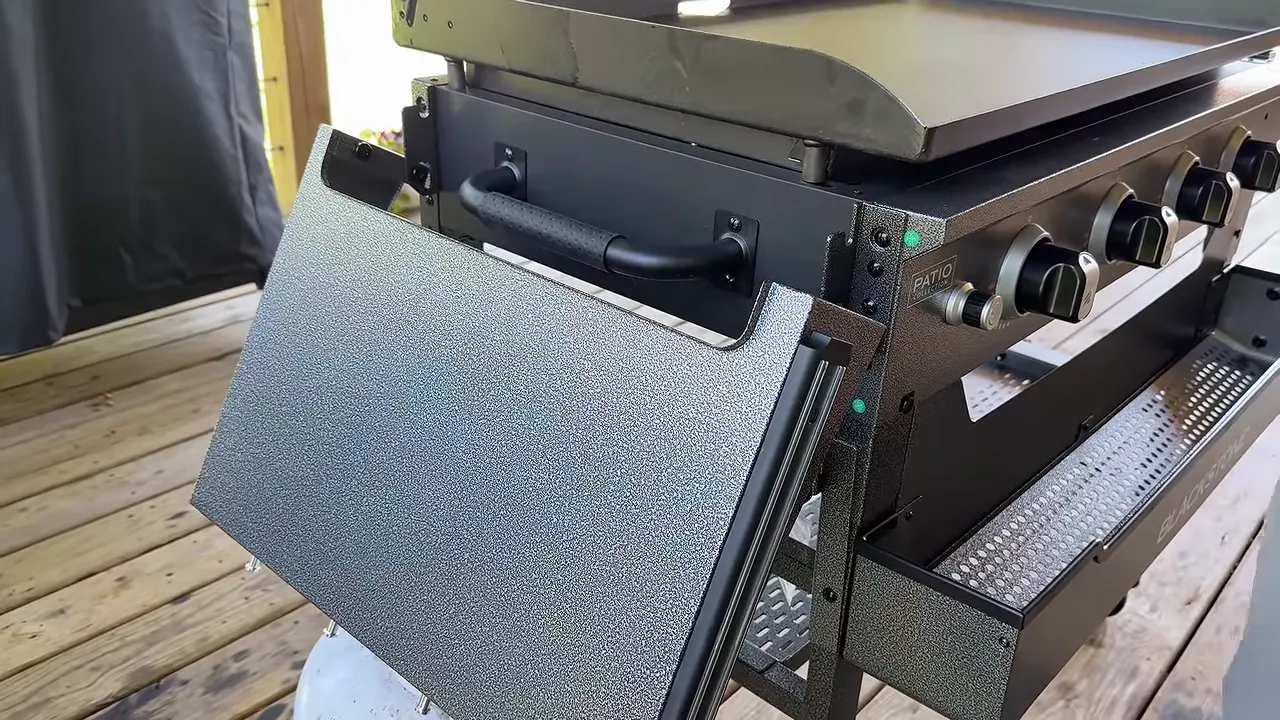
I also really like the hammered-metal look and the color combination. Whether it hides scratches better is something time will have to tell us, but right out of the box, I am all about that finish.
Getting the Pre-Seasoned Blackstone Ready to Cook
Before lighting anything, we washed the cooking surface with a little soapy water, rinsed it, and dried it thoroughly.
Why wash a brand-new griddle? Because it has been manufactured, packed, transported, and handled. I want dirt, debris, and any unwanted residue off that surface before food goes down. That first cleaning is not something I would skip just because the top is pre-seasoned.
After cleaning, we fired up the burners on low. There are small openings above the controls that let you check for a blue flame at each burner. Nothing fancy, but it is handy to see that each one is lit.
Then we went straight into cooking, without doing an initial seasoning cycle.
The Bacon Test: Good Release, Plus a Lesson for the First Cook
Let me clear something up: I did not cook bacon to season the griddle. I cooked bacon because it is breakfast, and because it helps show where the hot and cool areas are.
I often use bread to learn a new griddle's heat pattern. Bread is especially useful for beginners who want an easy visual comparison. This time, bacon and pancakes handled that job.
I laid the bacon horizontally across the surface so the strips extended through different heat zones. That lets you compare how quickly the sections nearer the middle cook against the sections closer to the edges.
The first piece grabbed the surface enough to make me think, “Uh-oh.” But once we got cooking, I was pretty impressed.
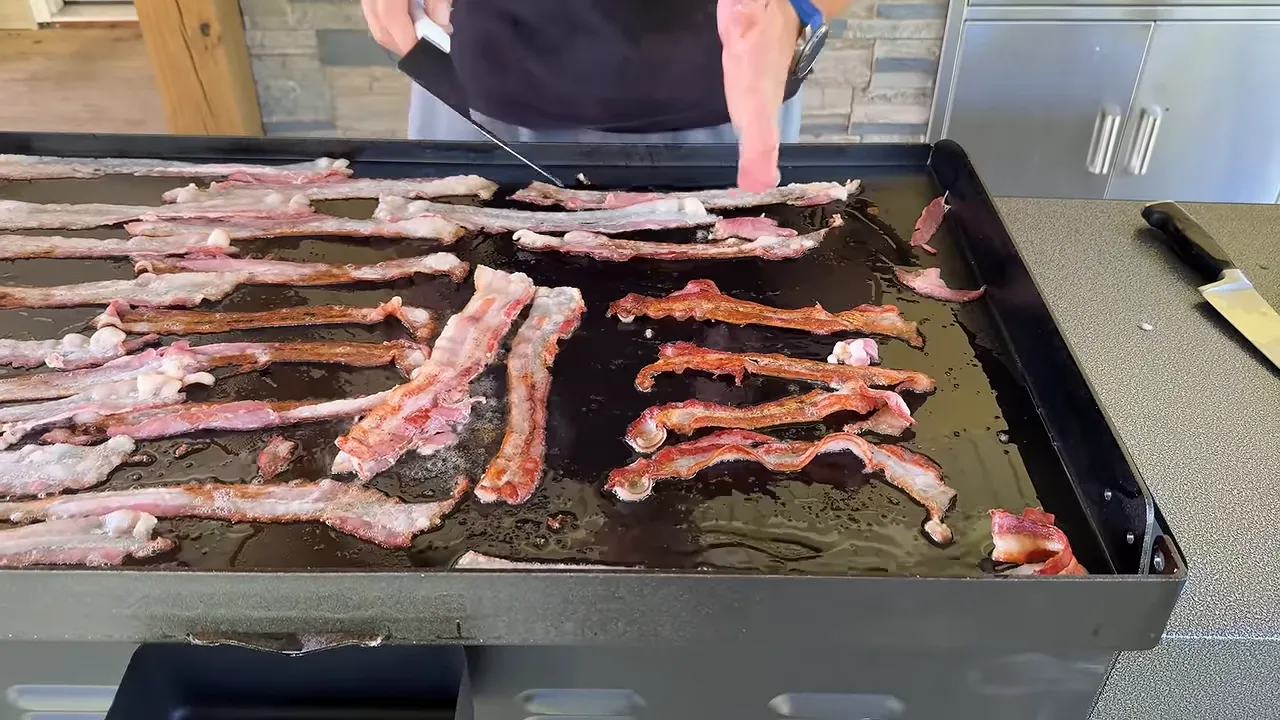
The center ran hotter, and the edges were a little cooler. That is familiar territory for the Blackstones I have used. It is not a reason to panic. It is information you use to cook better.
Some bacon did stick, but it released relatively easily overall. For factory seasoning, I would give that performance an A, with one change to my approach next time.
Put down a thin layer of cooking fat before that very first batch. A little avocado oil, tallow, or saved bacon grease probably would have helped.
Normally, after cooking and cleaning, I leave a light protective coating of oil on my griddle. This surface had just been washed and dried, with no additional cooking fat applied. Even though bacon renders plenty of fat, I would not count on that alone for the first contact with a freshly cleaned top.
And if you end up with more bacon than breakfast needs, heirloom tomatoes, lettuce, and good bread will take care of that problem. BLTs are my love language.
How Hot Did It Get on Low?
After the bacon finished, all four burners were still on low and had been running for quite a while. The bacon grease was smoking, so I checked the surface with an infrared thermometer.
The readings were roughly:
- Outer areas: about 400°F.
- Inner areas: around 430°F to 460°F, generally close to 450°F.
That was very much in line with the other Blackstone griddles I have used. These are observations from this cook, not a promise that every unit will hit those exact temperatures.
The practical lesson is that low on the knob does not necessarily mean a low cooking-surface temperature. After enough preheating, you still need to check what is happening on the steel.
For pancakes, we were aiming for about 375°F, so I shut all the burners off to let the top cool before continuing. As we brought the cooking area back toward our target, the hotter middle reached temperature first.
Homemade Pancakes: A Useful Second Test
Our homemade pancake batter gave us another chance to check both the factory seasoning and that center-to-edge heat difference.
The batter included these dry ingredients:
- Flour.
- Baking soda.
- Baking powder.
- Salt.
- White sugar.
We mixed those, then added whole milk, two eggs, oil, vanilla extract, sour cream, and apple cider vinegar. The sour cream is a star in this batter, and do not be scared of that vinegar. The mixed batter had plenty of froth, and those pancakes rose beautifully.
This is the ingredient lineup rather than a measured recipe. You can find our pancake recipe through The Flat Top King recipe website.
Butter or No Butter Under the Pancakes?
I am a butter-on-a-pancake kind of guy. My usual thought is simple: butter on the griddle adds butter flavor.
But somebody had suggested skipping butter underneath the batter to limit spreading, so we tried this batch without adding it. The pancakes came out thick and fluffy, with excellent height.

The browning also backed up what the thermometer had told us. Pancakes in the middle colored faster and darker than the ones nearer the edges.
That is why learning your griddle matters more than expecting the entire surface to behave exactly the same. Once you know the warmer and cooler areas, you can work with them instead of being surprised by them.
Most importantly for this test, the pancakes came off well without any extra seasoning rounds before cooking.
The Egg Test Was the Most Convincing Part
Bacon is one thing. Eggs are another.
If you have ever fought eggs stuck to a griddle, you know what a nightmare that can be. For me, this was the most convincing part of the first cook.
We added a little butter and checked its behavior. It bubbled nicely without immediately turning brown. That was a good sign that we had the heat where we wanted it for this stage.
I was also using the burners selectively rather than leaving all four running. Some were on and some were off, which gave us room to adjust the cooking pace.
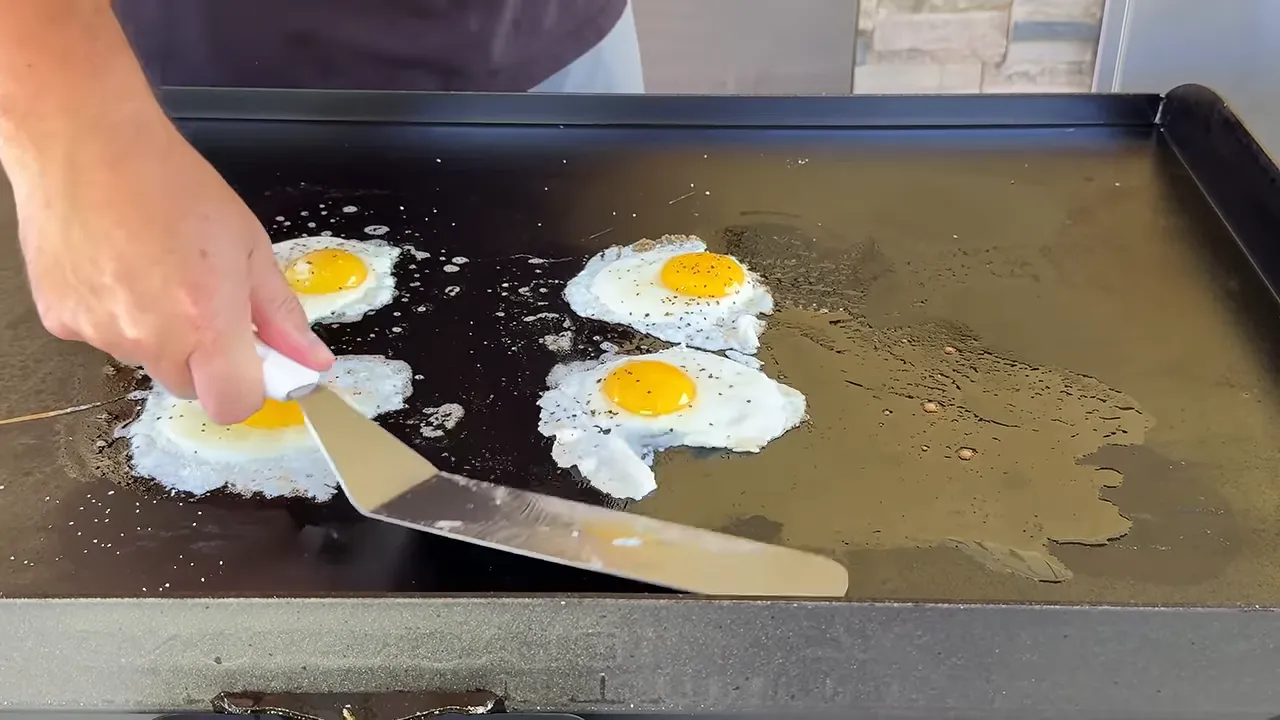
The eggs released cleanly and flipped easily. Spot-on.
I had not added a seasoning cycle between the bacon, pancakes, and eggs. We scraped away the bacon residue rather than deliberately leaving it there to build another layer. This was still a practical test of the factory-seasoned surface, with ordinary cooking fat.
When I wanted a little more color on an egg, I moved it from the area over an unlit burner to direct heat. That small adjustment bumped up the cooking temperature without needing to crank up the whole griddle.
What I Would Do After the First Cook
Even though the factory seasoning worked well, I would still personally add one or two rounds of seasoning afterward. That is my preference, not evidence that this griddle failed.
I felt similarly about the pre-seasoned Weber Slate. If a factory-seasoned top cooks well, great. If adding a couple of thin seasoning layers makes you more comfortable with your own process, that is your griddle.
After this cook, my plan was to:
- Remove the remaining food residue and butter.
- Clean the surface and use low heat to dry away moisture.
- Add a couple of seasoning rounds with avocado oil.
- Continue cleaning and protecting the surface after future cooks.
One thing I am particular about is not leaving butter residue as the last thing on a freshly seasoned cooking surface. I use butter for flavor during cooking, but I do not use it as my seasoning oil. Clean that residue off instead of letting it burn onto the top and calling it seasoning.
The factory layer gives you a starting point. Regular use and care still matter.
My First Impressions: This Blackstone Got a Lot Right
The proof is in the breakfast. The bacon did well, with a lesson learned about adding a little fat for the first batch. The pancakes came out fluffy and released nicely. The eggs were flawless.
There was one small issue to check: a little wobble. It was present before cooking, so I was not treating it as heat-induced warping. I wanted to double-check the assembly and how everything was sitting before deciding on a fix. A spacer washer had been suggested as a possible way to even things out, but I had not confirmed that solution.
Otherwise, I came away really pleased. I like the substantial feel, the folding shelves, the storage, and that color combination. The temperatures behaved much like the other Blackstones I have cooked on, so there were no big surprises there.
The real win is the pre-seasoned top. For somebody who wants a griddle but feels intimidated by that initial seasoning process, this first cook was encouraging. We cleaned it, dried it, and made breakfast without adding a single seasoning layer beforehand.
I am not ready to make a long-term durability claim after one meal. But as a first impression? Fantastic. This may be my favorite Blackstone yet.


