Crispy homemade hash browns ought to be simple. Grate a potato, put it on the griddle, and cook it, right? Well, after going through roughly 50 potatoes testing everything from grater size to rinsing methods, I can tell you there are a few places where things go sideways.
The goal is a crispy exterior with a fluffy potato texture inside. Not a gummy pile. Not potatoes soaked in grease. And definitely not hash browns that spend forever on the griddle without developing a good crust.
My wife and I landed on two favorite methods for making hash browns from fresh potatoes. We still disagree about which one is better, but that tells you something important: some of this is technique, and some of it is simply personal preference. Here is what worked, what did not, and how to get a batch worth putting on your breakfast plate.
What You'll Learn
- Large hand-grated shreds and towel drying gave us the fresh potato texture we preferred.
- Both single-rinsed and thoroughly rinsed potatoes made crispy hash browns in our tests.
- Start around 400°F to 425°F to account for heat lost when potatoes hit the griddle.
- Keep portions spatula-sized and cook the first side longer without adding unnecessary oil.
Table of Contents
- What You Need for Homemade Griddle Hash Browns
- 1. Use the Large Side of a Box Grater
- 2. Choose Your Rinse: Once or Until Clear
- 3. Dry the Shreds in a Tea Towel, Without Wringing
- What Oil Makes the Crispiest Hash Browns?
- Get the Griddle Hot Enough Before Adding Potatoes
- Three Common Mistakes That Ruin the Result
- Skip the Dome and the Weight
- How to Cook Crispy Hash Browns on the Griddle
- Our Results: Both Rinsing Methods Worked
- Are Fresh Potatoes Actually Our Favorite?
What You Need for Homemade Griddle Hash Browns
Keep the setup simple. We tested these in individual portions, starting with a small potato for each portion rather than trying to cook one giant batch.
- Fresh potatoes, peeled
- A box grater with large holes
- A bowl and strainer for rinsing and draining
- A clean, absorbent tea towel
- Your preferred cooking oil or fat
- A griddle and a spatula large enough to support each portion
- An infrared thermometer, if you use one to check surface temperature
I am not worried about getting every last tiny spot of peel off. The bigger issues are the size of the shreds, how you dry them, and what happens once they hit that hot griddle.
1. Use the Large Side of a Box Grater
We tried machine-grated potatoes and hand-grated potatoes, and we both preferred the hand grater. The machine we tested produced shreds that were a little too fine. Once cooked, that texture just did not make either of us want to go back for more.
Use the large holes on your box grater and apply firm, controlled pressure. That helps you get the fullest shreds those holes can produce. If you barely skim the potato across the grater, you end up with smaller, finer pieces, which moves you toward the machine-grated texture we did not prefer.
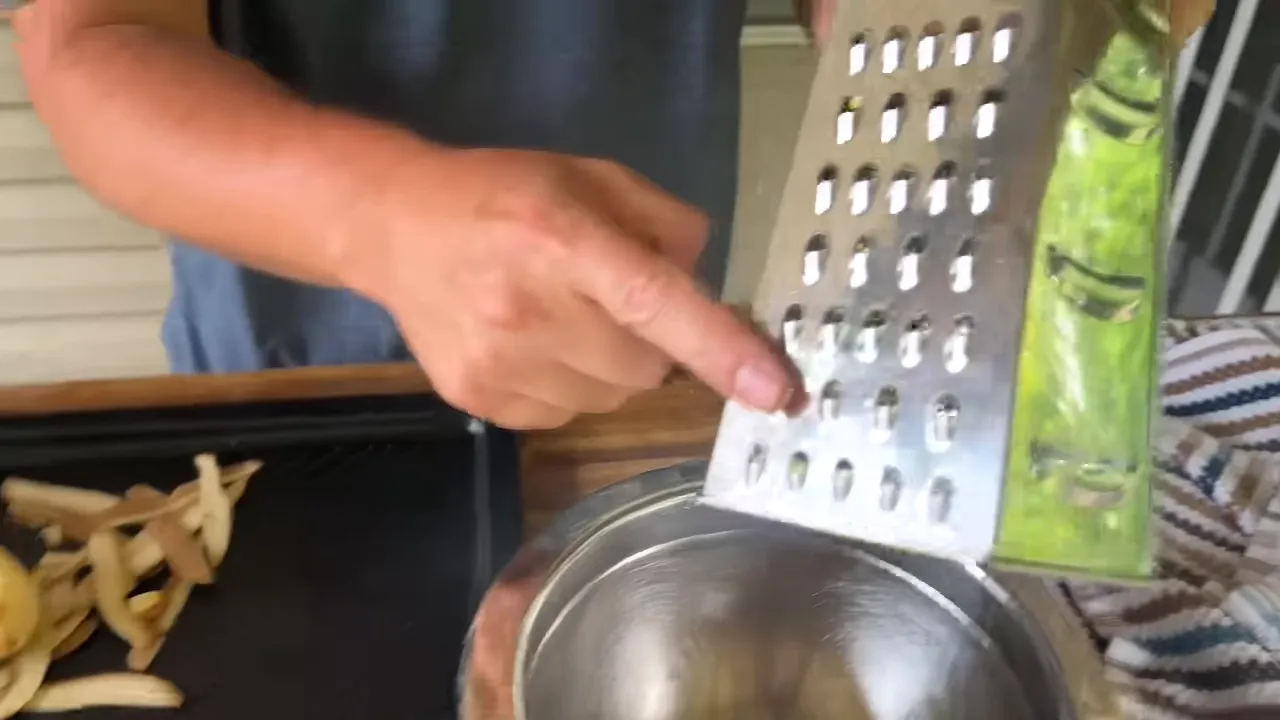
Those larger shreds gave us a better balance between the crispy outside and the fluffy inside. For this method, that texture is worth a little hand grating.
2. Choose Your Rinse: Once or Until Clear
This is where our preferences split. We found two approaches that made good crispy hash browns, and the difference between them was much smaller than the difference between a properly cooked batch and a poorly cooked one.
Option A: Rinse Once and Leave Some Starch
Put the grated potatoes in a bowl and add enough water to cover them. Let them sit for about a minute, then drain.
The water will still be cloudy. You are removing some starch, not trying to wash every bit away. That remaining starch helps the shreds hold together, and in our tests, the less-rinsed potatoes also browned more readily.
This was my wife’s favorite. She preferred the texture of the potatoes with a little starch left on them.
Option B: Rinse Until the Water Runs Clear
For my preferred version, rinse and drain the potatoes repeatedly until the water is clear. Our comparison batch took three washes.
Gently move the shreds around in the water as you rinse. The first bowl will look cloudy and may have bubbles on top. With each change of water, that cloudiness decreases and the individual shreds become more distinct.
I preferred the mouthfeel of the thoroughly rinsed potatoes. My wife still preferred the single rinse. Both methods produced a crispy finished batch, so clear rinse water is not the only route to success.
3. Dry the Shreds in a Tea Towel, Without Wringing
We preferred a tea towel over paper towels. Spread the drained potatoes across it in a very thin layer, then fold or roll the towel over them so the fabric can absorb the moisture.
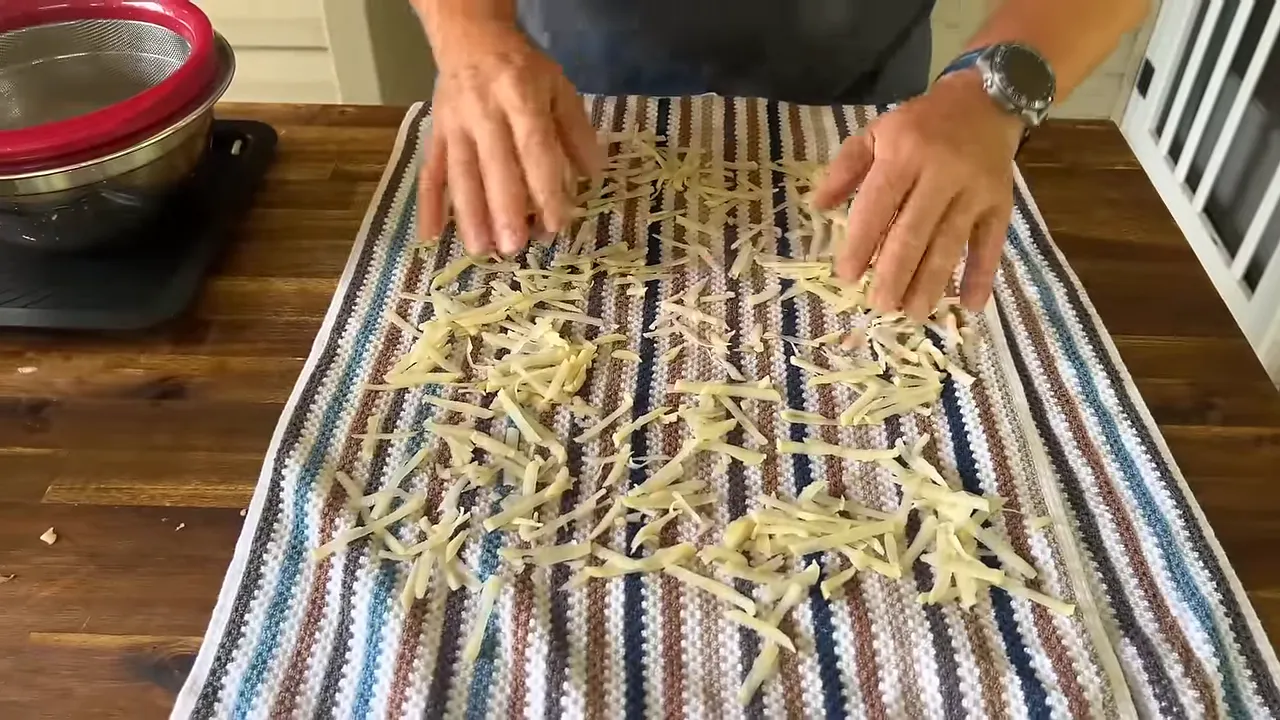
Here is the part that may be different from what you usually hear: I did not prefer aggressively wringing the potatoes out. In our testing, the wrung-out potatoes seemed gummy. Letting the towel absorb the moisture gave us a texture we liked better.
That is a preference based on our batches, not a declaration that nobody can make good hash browns by squeezing them. But if your current method leaves you unhappy with the texture, this is worth changing.
You can keep the towel-wrapped shreds in the refrigerator for a few hours before cooking. Most of our test batches held without discoloring, but one of the final single-rinse batches did turn brown before it went on the griddle. So I would not promise that the towel prevents browning every time.
What Oil Makes the Crispiest Hash Browns?
We tested the fats I commonly cook with, including tallow, ghee, butter, avocado oil, and peanut oil. Other than butter’s behavior during repeated batches, I did not find a significant enough difference to call one the clear winner.
This is not a health sermon about which oil you should use. Pick the cooking fat that works for you.
Butter was fine for a single portion, but it tended to burn as we kept cooking batch after batch across the griddle. If you are making a lot of hash browns, I would avoid relying on butter alone for the whole cook. You can still add butter for flavor.
The bigger lesson was quantity: more oil was not always better. Some batches absorbed enough oil that they landed somewhere between crispy and greasy. That was not the result either of us wanted.
Get the Griddle Hot Enough Before Adding Potatoes
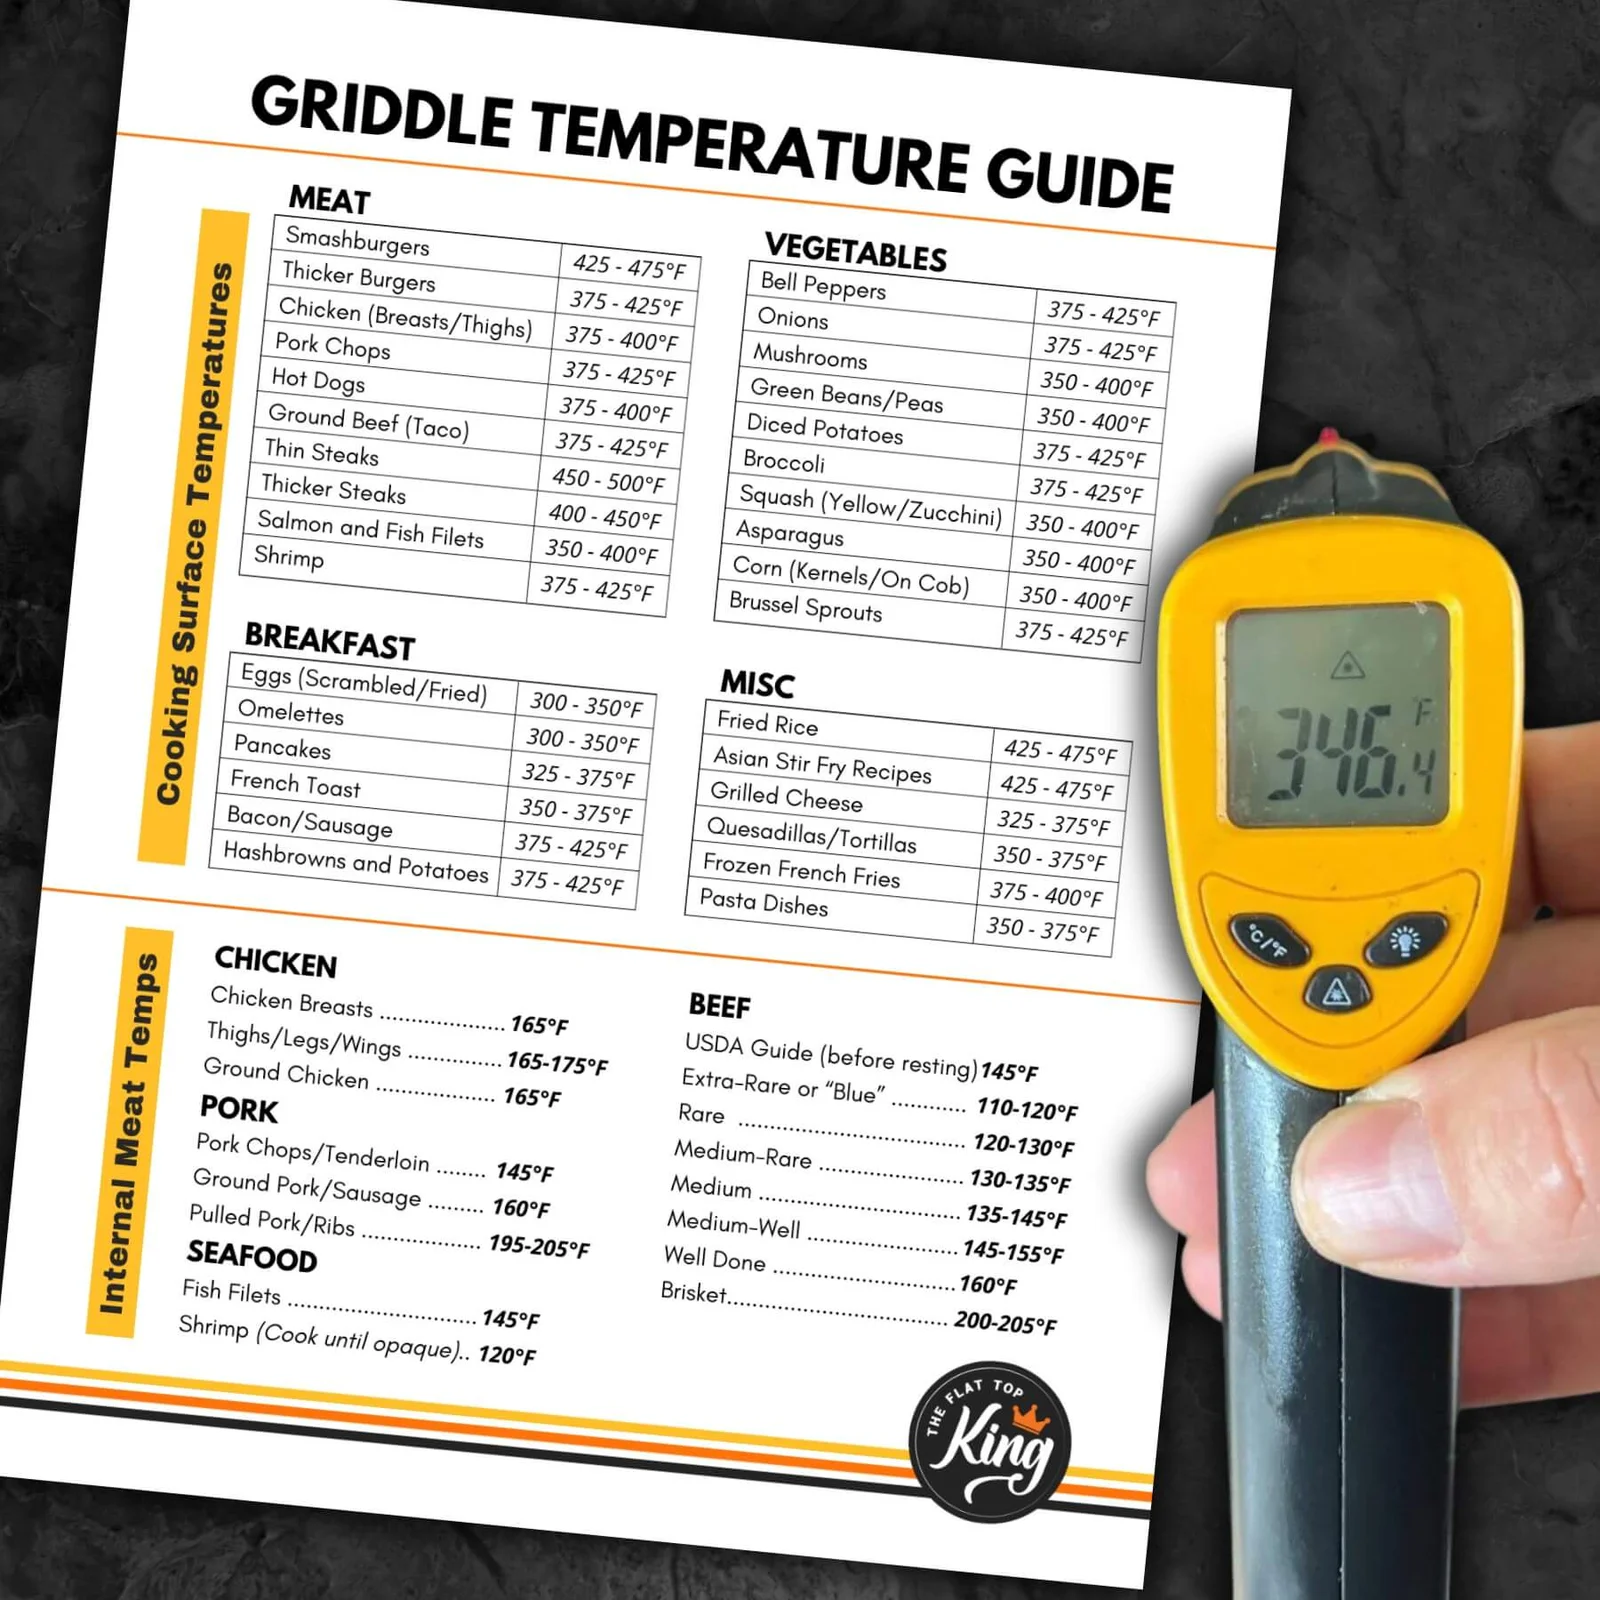
Our griddle temperature guide lists 375°F to 425°F for hash browns and potatoes. For fresh shredded potatoes, I prefer starting toward the higher end, around 400°F to 425°F, depending on how the griddle heats and recovers.
Why start higher? Because the potatoes pull heat out of the cooking surface.
Think about deep frying. If you add food to hot oil, the temperature drops. The same basic thing happens on a griddle. A surface that reads 375°F before the potatoes go down is not necessarily staying at 375°F underneath that pile.
In our testing, a spot that started around 410°F later read closer to 350°F to 375°F during cooking. That is why a thermometer reading is useful, but it is not the whole story. Your burner setting, the amount of food, and the griddle’s recovery all matter.
If an empty cooking zone overshoots your target slightly, a very small splash of water, cleared with a scraper, can bring it down quickly. We brought one spot from roughly 430°F to around 400°F this way. Do that before adding oil, use caution around steam, and let the water clear before cooking.
Our free printable griddle temperature chart is handy for keeping these starting ranges nearby.
|
Three Common Mistakes That Ruin the Result
Mistake 1: Starting With Too Little Heat
We deliberately put one portion on a cooking zone around 300°F to 325°F. It eventually gained temperature, but the potatoes spent too much of the cook on a surface that was not hot enough to fry them properly.
The result was light, uneven browning rather than a well-developed crust. By the time you keep cooking long enough to chase that crispiness, you can overcook the potatoes trying to fix the outside.
Preheat properly instead of asking the potatoes to wait while the griddle catches up.
Mistake 2: Making a Pile Your Spatula Cannot Support
Your spatula is a built-in portion guide. If the hash browns extend well beyond it, the unsupported edges can tear off when you flip.
I use the same idea when making an omelet. It is much easier to turn something over cleanly when the spatula supports the whole thing.
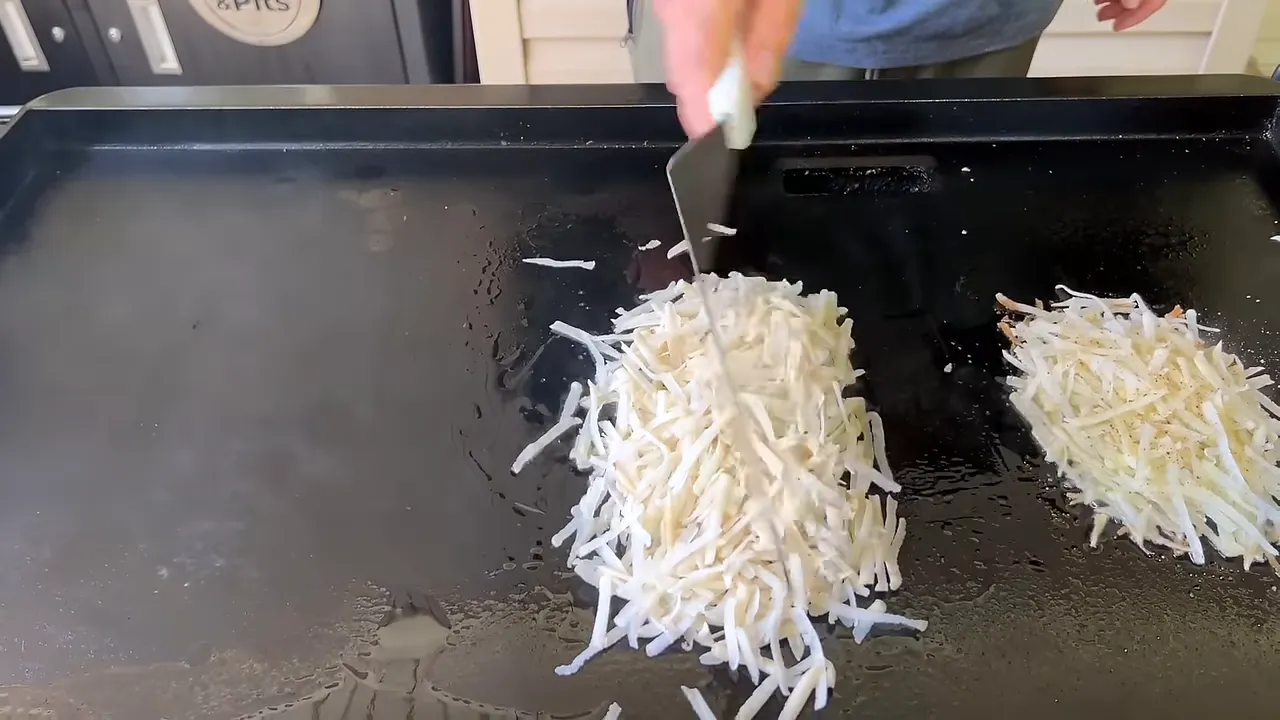
I would rather cook two manageable portions than one oversized pile. Personally, broken hash browns do not bother me one bit. But if you want them to stay together, matching the portion to the tool makes a real difference.
Mistake 3: Flipping Before the Crust Develops
Even with the right starting temperature, impatience can give you the same disappointing result as a cool griddle.
A few brown strands around the edge do not necessarily mean the entire underside is ready. The potatoes need time to fry and develop a crust across the bottom.
Our early-flip test was pale and uneven, much like the low-temperature test. Different mistake, similar outcome. Give that first side time to do its job.
Skip the Dome and the Weight
In our tests, neither a dome nor a weight helped us get the texture we wanted.
When we lifted a weight, moisture had collected underneath it. A dome can also trap moisture, especially if it has no vent. That condensation works against the crispy result we are after by keeping the potatoes in a steamy environment.
You can see steam rising from uncovered fresh hash browns as they cook. That moisture escaping is exactly what I want. For this method, leave the potatoes uncovered and skip the press.
How to Cook Crispy Hash Browns on the Griddle
Once the potatoes are grated, rinsed, and towel-dried, the cooking process is straightforward. The hard part is leaving them alone long enough.
- Preheat the cooking zone. Start around 400°F to 425°F, adjusting for how your griddle behaves.
- Add a modest amount of oil. Give the portion an oiled cooking area without creating a deep pool.
- Add the potatoes. Shape them into a manageable portion that your spatula can fully support.
- Let the first side develop its crust. Keep the potatoes uncovered and allow moisture to escape.
- Use nearby heat if needed. Once the portion can move together, slide it slightly onto an adjacent hotter area if its original spot has cooled.
- Flip when the underside reaches your preferred crispness. Support the portion with the spatula.
- Finish the second side more briefly. I do not automatically add more oil after flipping.
I think about this a little like a smash burger. You develop that first side thoroughly, then the second side needs less time. The comparison is about how I manage the cook, not an instruction to smash the potatoes under a weight.
For my ideal hash browns, the first side is the presentation side. I want it deeply crisp. I do not need the second side to spend equally long on the griddle, and trying to make both sides identical made our batches greasier than we liked.
There is no single cooking time I would give you here. The surface temperature changes under the potatoes, and different griddles recover differently. Follow the crust and the texture rather than forcing every batch onto the same timer.
Our Results: Both Rinsing Methods Worked
The final comparison gave us exactly the kind of results we had been getting during testing: two crispy portions with a small but noticeable texture difference.
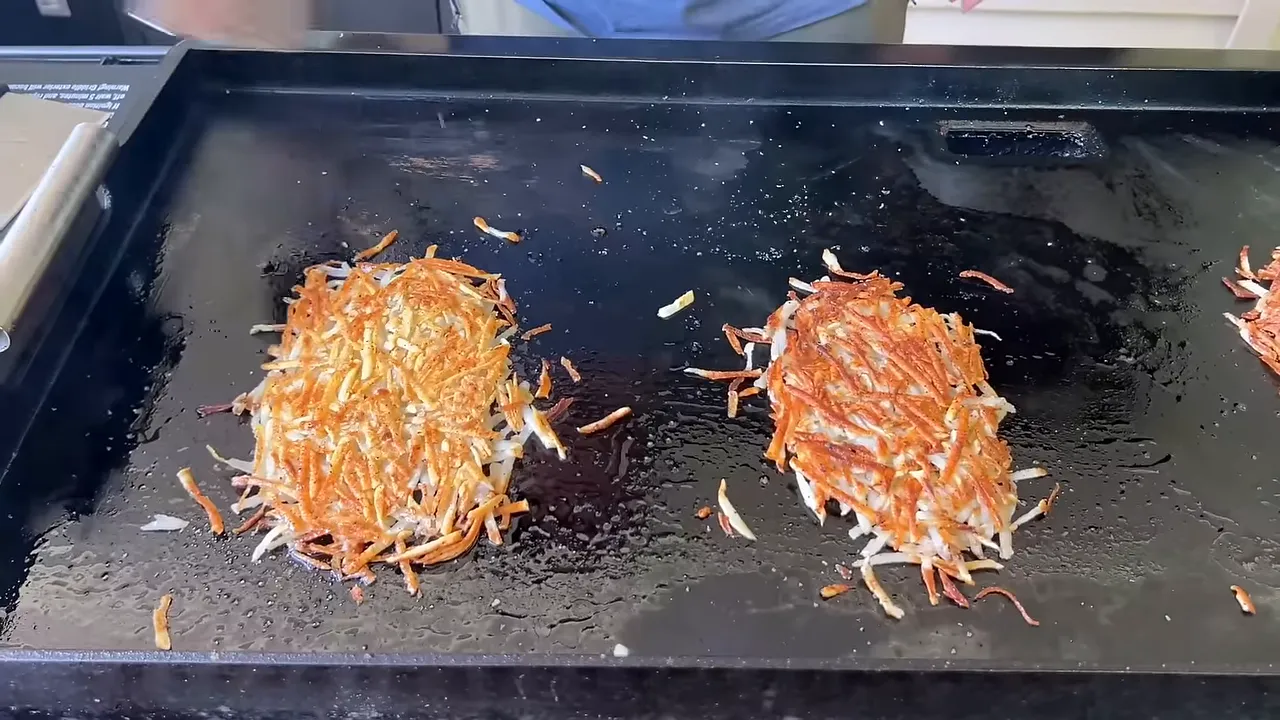
- Single rinse: More starch remained, the portion browned more deeply, and my wife preferred its texture.
- Three rinses until clear: The shreds were more distinct, and I preferred the finished mouthfeel.
- Both: Developed crispy exteriors when we used enough starting heat and waited before flipping.
We like ours pretty crispy. If you prefer a lighter crust, turn them sooner than we did in the final comparison, but still give the underside enough time to set. There is a difference between choosing a lighter crust and flipping before one has formed.
Are Fresh Potatoes Actually Our Favorite?
After all that testing, here is the honest answer: no.
These fresh homemade hash browns were good. We worked out methods we would happily use. But my favorite is still refrigerated bagged Simply Potatoes. I prefer the texture, I think they hold up well, and the convenience certainly does not hurt.
My wife leaned toward dehydrated hash browns as her overall favorite. Neither of us picked fresh grated potatoes over every other option.
That does not make fresh hash browns wrong. It means you do not have to turn breakfast into a potato science project unless making them from scratch is something you enjoy.
A Tip for Frozen Shredded Hash Browns
If you use frozen hash browns on the griddle, my recommendation is to portion them out, break up the clumps, and thaw them completely in the refrigerator the night before.
Adding frozen potatoes pulls a lot of heat from the cooking surface. In my experience, that makes it harder to get the texture I want while the griddle recovers. Even if the package provides a cook-from-frozen method, I prefer starting with thawed shreds for this approach.
Keep thawing refrigerated rather than leaving the potatoes on the counter. The USDA’s safe thawing guidance explains why refrigerator thawing is a good planning-ahead method.
The biggest improvements are not complicated: use larger shreds, dry them well, start with enough heat, keep the portions manageable, and be patient with that first side. Get those things right, and whether you rinse once or three times becomes a preference instead of a breakfast emergency.


