First off, welcome to the fam! A new griddle means a whole lot of fantastic meals ahead. But before you throw that first pound of bacon on the flat top, there are a few things worth getting right.
You do not need a drawer full of accessories, a perfectly black cooking surface, or a five-star menu for your first meal. You need the right basics, a little patience with seasoning, and a cleaning routine you can stick with.
After cooking on griddles in the Navy and spending years working with everything from small portable models to stainless steel, rolled steel, and coated surfaces, these are the five areas I think matter most for a new griddle owner.
What You'll Learn
- Start with basic tools and distinguish food temperature measurements from griddle surface readings.
- Check covered griddles for trapped moisture instead of assuming a cover prevents rust.
- Build steel griddle seasoning with several thin oil layers rather than a few thick coats.
- Choose a familiar first meal, then clean in sections, dry completely, and oil lightly.
Table of Contents
- 1. Buy the Griddle Accessories You Actually Need
- 2. Protect Your Griddle, but Do Not Forget About Trapped Moisture
- 3. Season Your Griddle with Thin Layers, Not Puddles of Oil
- 4. Make Your First Griddle Meal Something Simple
- 5. Clean Your Griddle in Sections and Finish with a Thin Coat of Oil
- Keep It Simple and Keep Cooking
1. Buy the Griddle Accessories You Actually Need
It is easy to get overwhelmed by griddle accessories. There are taco holders, egg rings, presses, domes, racks, gloves, and enough spatulas to fill a toolbox. Some of those are handy. That does not mean you need all of them before dinner.
Start with these six essentials
- A sturdy water bottle. You will use water for cleaning, steaming, and loosening food residue. A squeeze bottle gives you control over where it goes.
- A sturdy oil bottle. Oil is part of seasoning, cooking, and maintaining a steel griddle. Keep it separate from your water so both are ready when you need them.
- Good paper towels. You will go through these while seasoning and cleaning. Cheap towels tend to tear, break apart, and leave little bits behind. This is one basic item worth upgrading.
- A comfortable spatula. I like a little flexibility, rounded corners, and a handle angle that feels natural. Rounded corners help keep you from digging into that seasoning you just worked so hard to build.
- A scraper. A bench scraper or dough cutter works, and I used one for years. A raised-handle scraper keeps your hand farther from the hot surface, which can make cleanup more comfortable.
- A probe thermometer. Measuring the internal temperature of your food is important whether you are a beginner or an experienced cook. This is one of the most useful tools in the kitchen, indoors or outside.
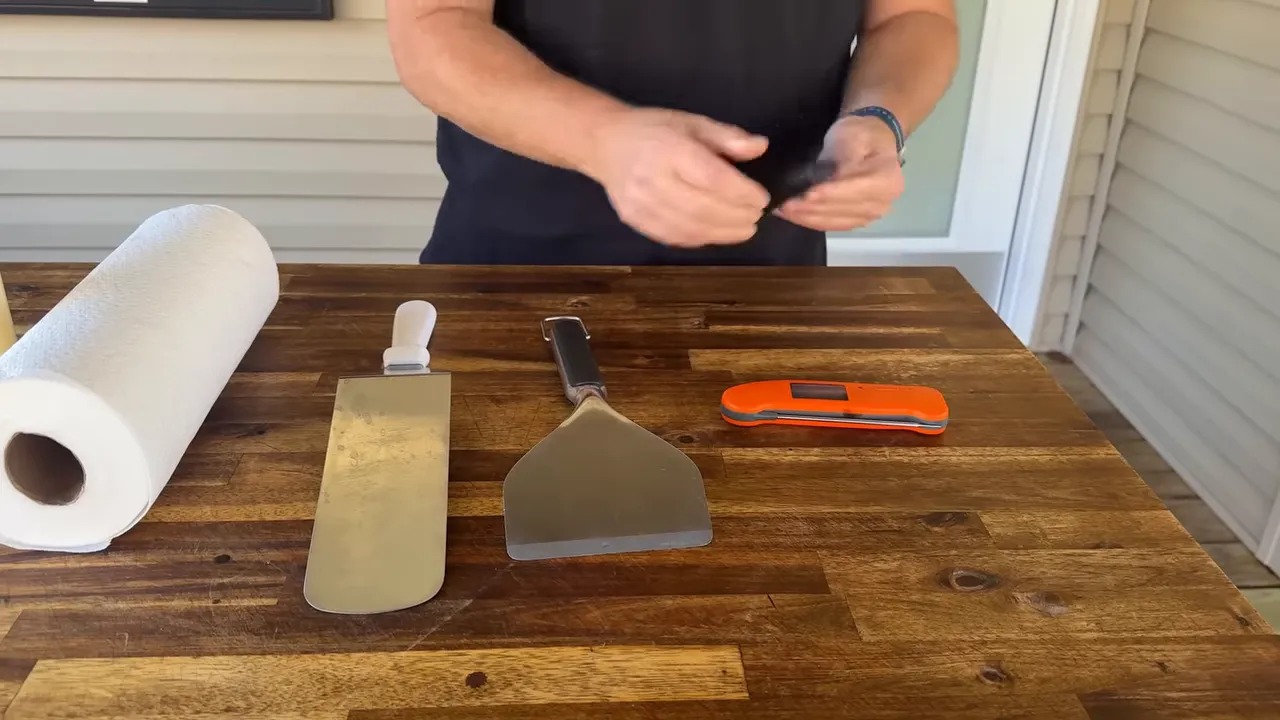
My favorite style of griddle spatula typically runs about $11 to $15. You do not have to spend a fortune to get something useful. Pay attention to how it flexes, how the handle feels, and how easily you can slide it under food.
As for paper towels, I have used the blue shop towels, but I personally have not found them worth the extra money over a good-quality household paper towel.
Match your tools to your cooking surface. The metal tools I use on a traditional steel flat top are not automatically the right choice for a coated griddle. Check your model's care instructions before choosing utensils or cleaning tools.
The extras I would consider next
- A dome and resting rack: The rack lifts food off direct heat, while the dome helps trap steam and heat. This combination is useful for foods such as potatoes.
- A burger press: Handy for burgers, bacon, and other foods that benefit from even contact with the cooking surface.
- Heat-resistant gloves: Useful for seasoning and cleaning jobs around hot equipment.
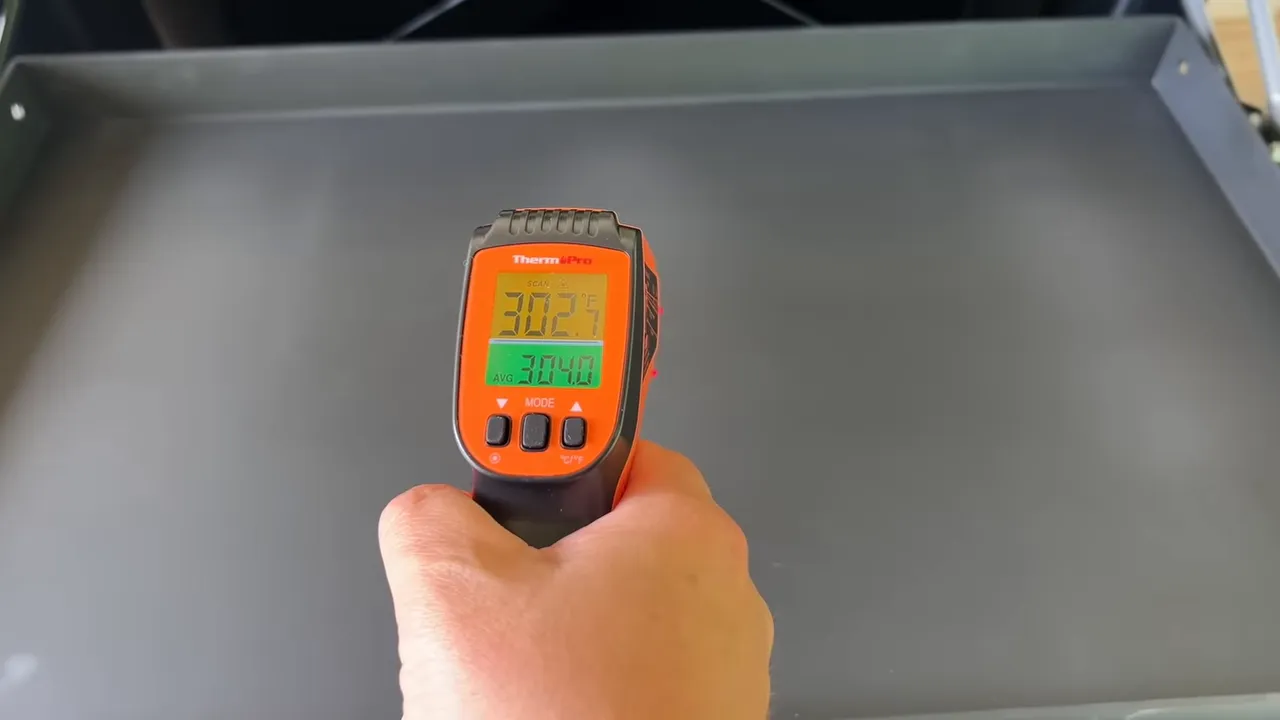
- An infrared thermometer: Measures the surface temperature of your griddle, rather than the internal temperature of your food.
That last distinction matters. An infrared thermometer does not replace a probe thermometer. One tells you about the cooking surface; the other tells you about the food. For a reliable food-safety reference, keep the safe minimum internal temperature guide handy.
Learn your griddle's temperature, not somebody else's knob setting
Whether an infrared thermometer belongs on the must-have list is up for debate. I put it very high on the helpful list because “medium” does not mean the same thing on every griddle.
A two-burner portable model can behave differently from a four-burner backyard model. Even griddles from the same brand can have different heat output and heat distribution. Cold weather and wind change things, too.
If I cook something on medium, that does not mean your medium setting will give you the same surface temperature. An infrared thermometer helps you understand what your particular griddle is doing instead of guessing from the position of a knob.
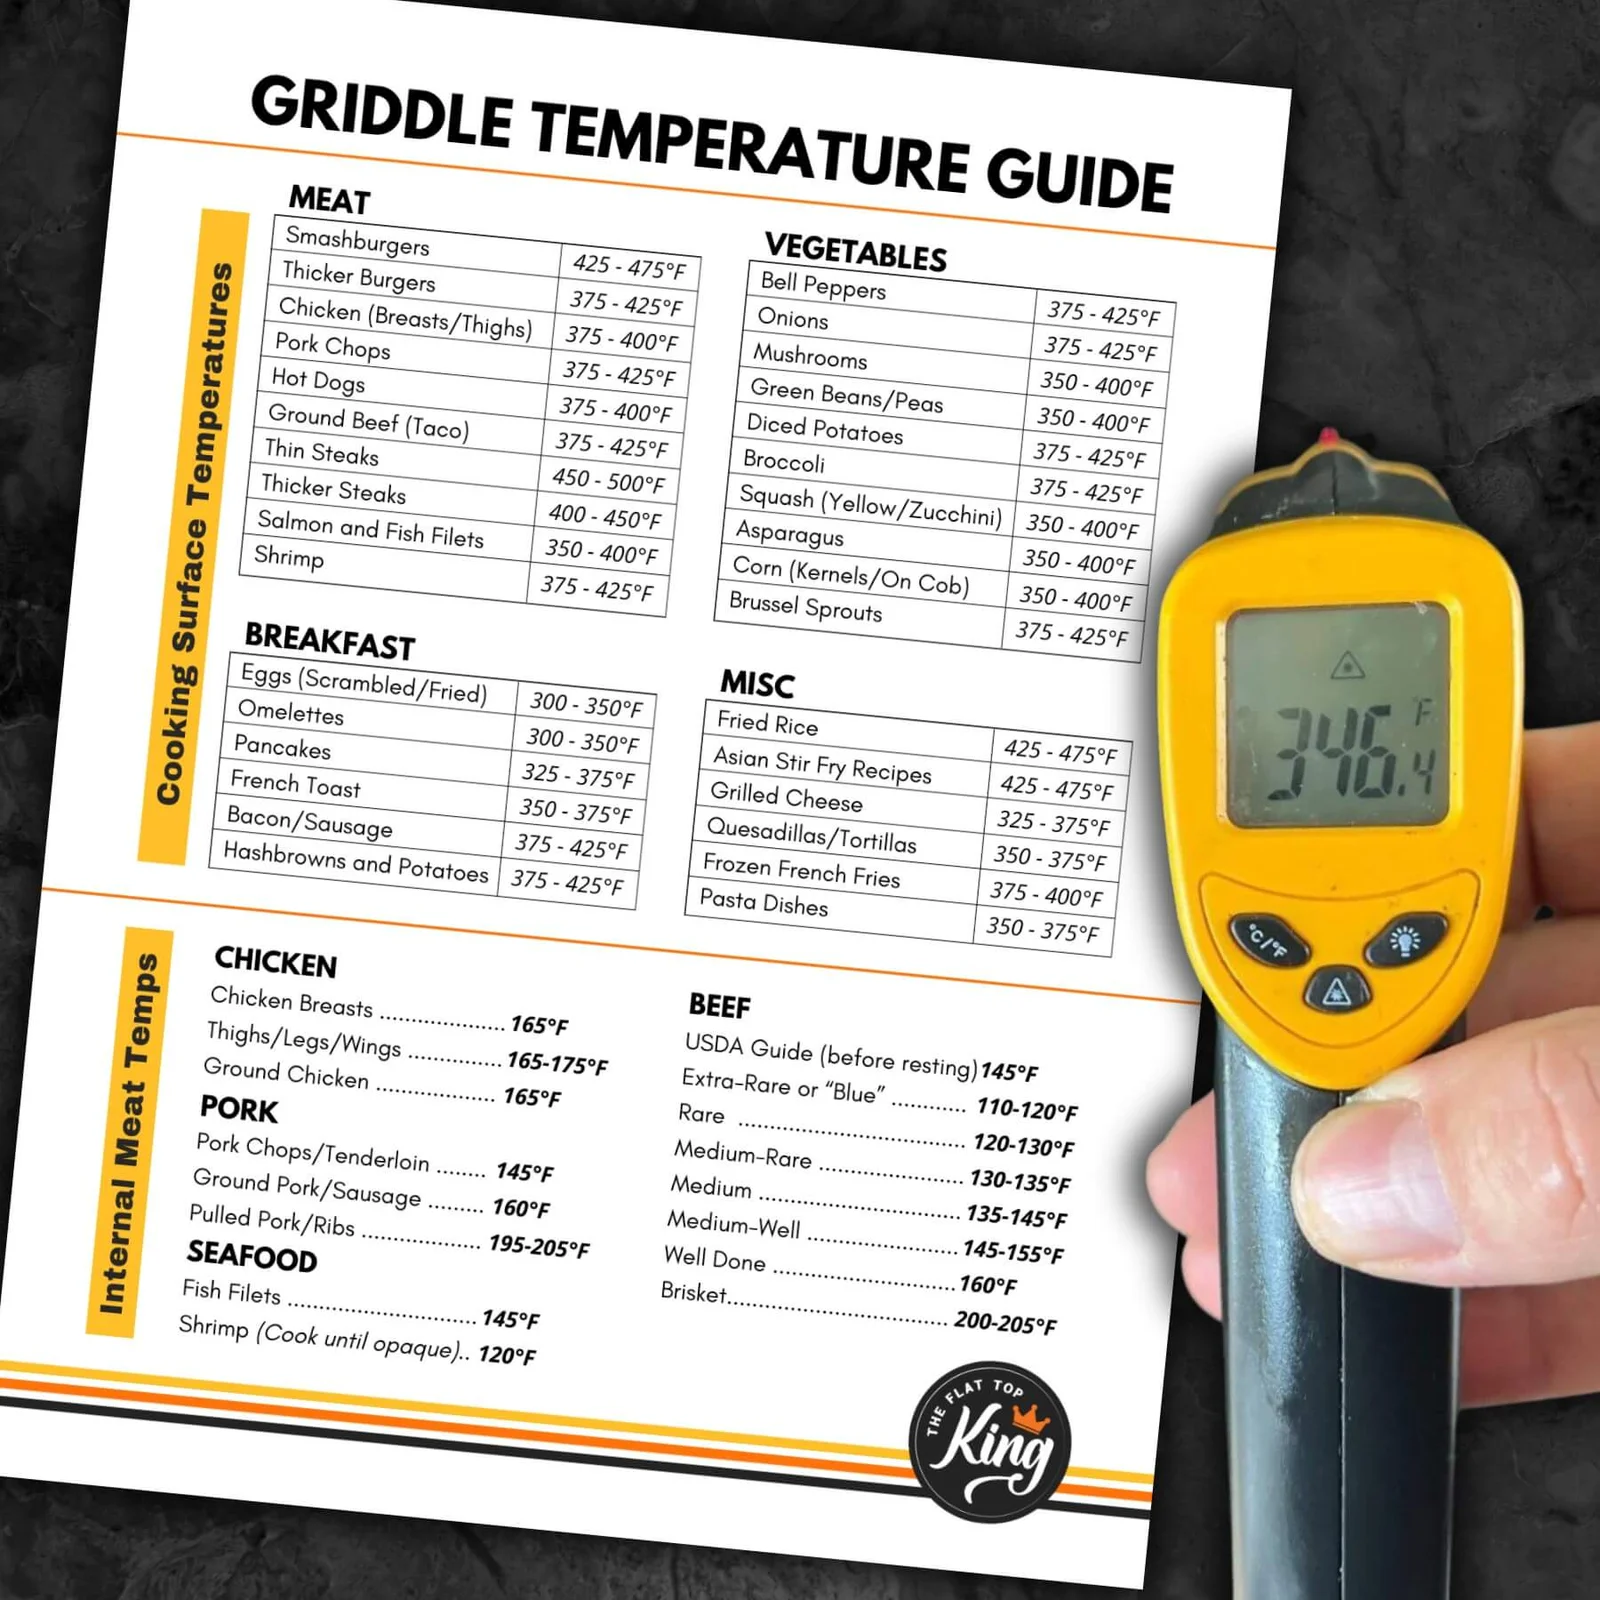
Our free printable griddle temperature chart gives you a quick reference for the surface temperatures to aim for with different foods. Pair that with an infrared thermometer, and you have a much better starting point than simply copying a burner setting.
|
2. Protect Your Griddle, but Do Not Forget About Trapped Moisture
A cover is one of the most important things you can use to protect your investment. But putting a cover on does not mean moisture and rust are no longer possible.
Soft covers keep weather out, but moisture can come from below
A soft cover helps keep rain and other weather off the griddle. That matters even under a covered porch. I have a big covered porch, and storms still blow moisture onto equipment.
Here is the part that gets overlooked: water does not only come down from above.
When the deck, grass, or stone underneath your griddle gets wet, that moisture can evaporate upward. If it gets under a waterproof cover, it can become trapped.
A covered griddle still needs to be checked. If yours sits unused, remove the cover periodically and let things air out. If necessary, uncover it fully and briefly heat the griddle to help dry the surface. Let it cool before covering it again.
There is no magic number of days between checks. Your weather, storage location, and how often you cook all matter. The important thing is not to cover it and forget about it for a long stretch.
Hard covers are helpful, but they are not a complete seal
A hard cover or lid keeps a lot of things from landing directly on the cooking surface. It does not necessarily stop insects, mice, or other pests from finding a way underneath.
Think of a hard cover as protection, not a guarantee that nothing can reach the griddle top.
Why I am not sold on silicone griddle mats
This is a personal preference, but silicone griddle covers are not something I rely on.
They can protect the surface they cover. My concern is what happens when you remove them. A maintained steel griddle has a thin film of oil on it, and the underside of the mat picks up some of that oil. Set that oily side down somewhere, and it can collect dirt, pollen, and debris. Put it back on the griddle, and that debris comes along for the ride.
A mat also is not a substitute for weather protection. Moisture can work its way around the edges and underneath it, creating the damp conditions you were trying to avoid.
If you choose to use one, pay attention to both its cleanliness and what is happening underneath it.
3. Season Your Griddle with Thin Layers, Not Puddles of Oil
Before getting into how to season a griddle, make sure the process applies to yours.
These seasoning steps are for a traditional steel cooking surface that requires seasoning. A stainless steel griddle does not get this same treatment. Some models, such as the Weber Slate, arrive pre-seasoned. Coated surfaces have their own care requirements. Start with the instructions for your particular griddle.
Choose an oil and use only as much heat as you need
I recommend avocado oil or grapeseed oil for seasoning. Other people have success with different oils, but those are two options I am comfortable recommending.
The bigger issue is how much you apply. Less oil is better. I would rather build five to seven very thin layers than rush through three thick ones. Heavy layers are more likely to flake, and then you have a repair job instead of a cooking surface.
You also do not automatically need every burner on high. You need enough heat for the oil you chose to smoke and form that seasoning layer.
Avocado oil's smoke point varies by product, roughly from 450°F to 520°F. I have used griddles that can reach 750°F to 800°F. At those temperatures, you can burn through seasoning rather than improve it. More heat is not always better.
How to season a brand-new steel griddle
- Wash the new surface. Use soap and water to remove manufacturing residue, dirt, and debris before the first seasoning, following your manufacturer's instructions.
- Dry it completely. Wipe it down with paper towels, then turn the griddle on to evaporate any remaining moisture. You want it completely dry.
- Apply a very small amount of oil. Spread it over the cooking surface and the inside walls. There should be no puddles or heavy streaks.
- Wipe away the excess. Once your first towels are saturated, use fresh towels to make another pass. The goal is a thin coating, not a visibly wet layer.
- Let the layer finish smoking. A round often takes about 10 to 15 minutes. Expect more smoke at first, then progressively less. Once the smoking stops, you are ready for another thin coat.
- Repeat in thin rounds. Build the seasoning gradually rather than trying to make the surface dark with a few heavy applications.
Use suitable heat protection and tools to keep your hands clear of the hot steel while spreading oil.
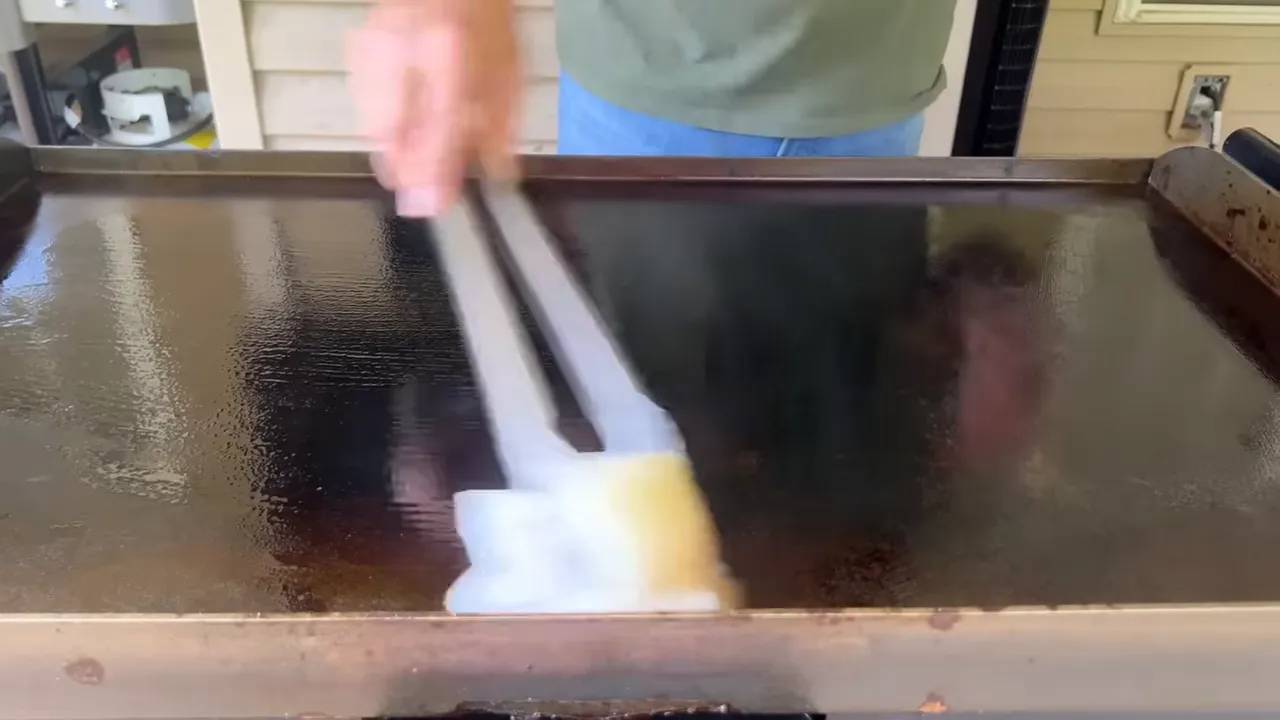
One thing I have changed my mind about over the years is sanding a brand-new griddle before seasoning. I used to do it. After working with more griddles, I now prefer to season the new surface as it comes rather than automatically sanding or using a grill brick on it.
And please, do not use bacon as your initial seasoning method. Season the griddle first. Bacon can come afterward.
If you need more help with uneven or failing seasoning, our seasoning troubleshooting guide goes deeper into the process.
Your seasoning does not have to look perfectly even
A freshly seasoned griddle can have different colors and patterns. That does not automatically mean you did something wrong.
Different manufacturers, burner layouts, and steel tops create different seasoning patterns. On a typical Blackstone, the center often darkens before the outer edges.
I call the gradual darkening around the outside “earning the edges.” As you cook, maintain the surface, and keep using it, seasoning builds into those areas.
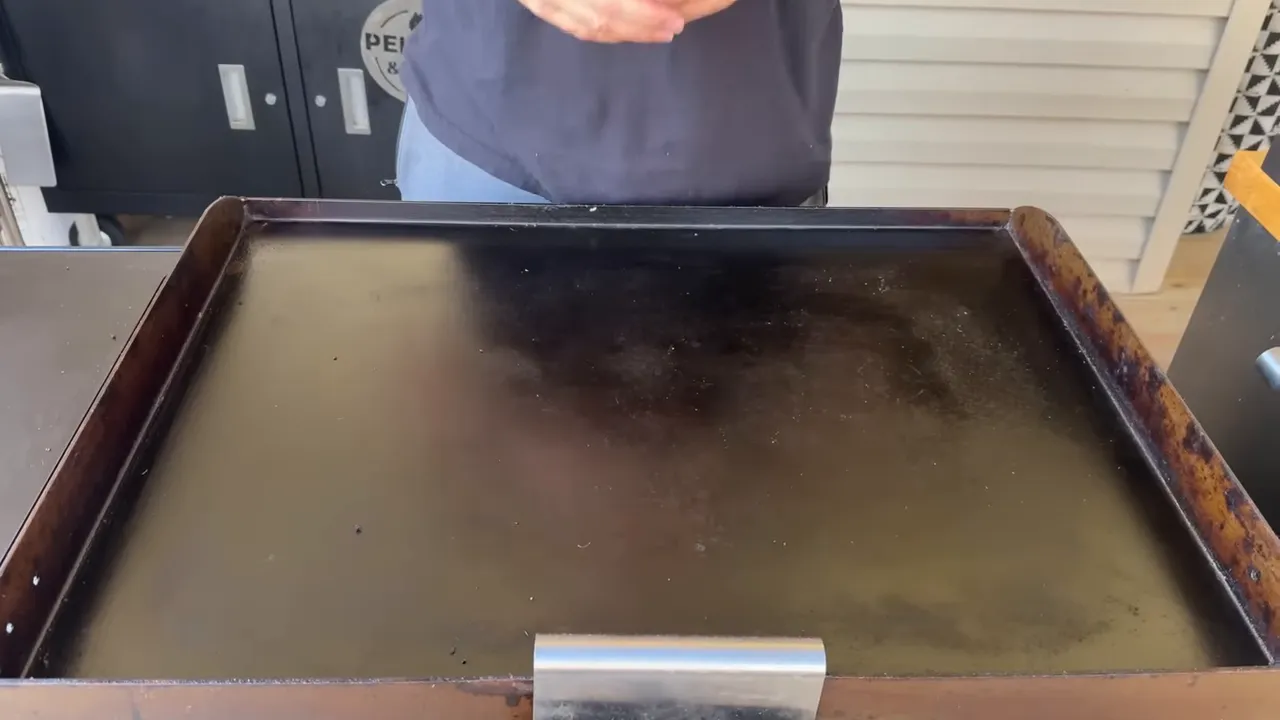
This is cooking equipment. It needs to be used. Do not get so caught up in making it look flawless that you never get around to making dinner.
4. Make Your First Griddle Meal Something Simple
Your accessories are ready, and your griddle is seasoned. Now what should you cook first?
My biggest recommendation is to choose something you already feel confident making. You are learning a new cooking surface. You do not also need to learn an elaborate recipe at the same time.
A full hibachi-style meal may sound like the perfect kickoff, but it involves a lot of prep, timing, and moving parts. Food can cook surprisingly fast on a griddle, so finish your prep before the ingredients hit the steel.
Good first foods for a newly seasoned griddle
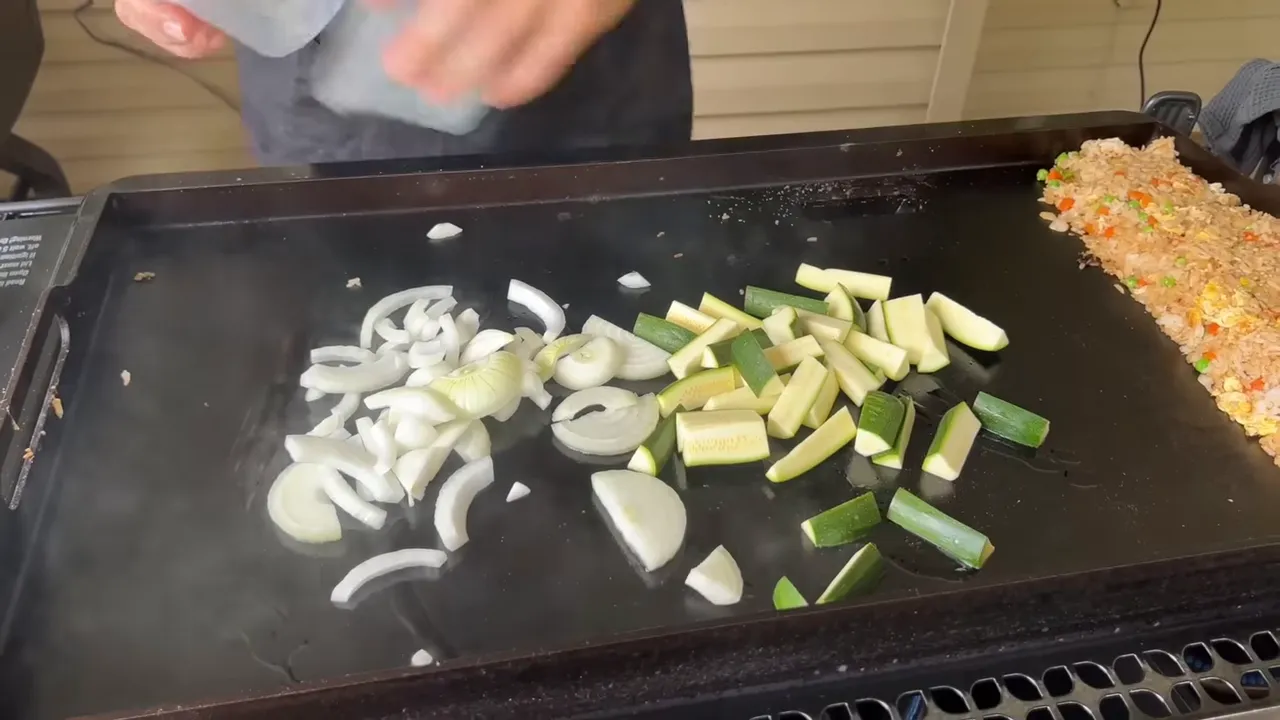
- Onions and zucchini: Straightforward vegetables cooked with a suitable high-heat oil make a good place to start. Keep the sugary sauces out of the equation for now.
- Ground beef: It brings its own natural beef fat and gives you a chance to get comfortable moving and cooking food on the surface.
- Bacon, after seasoning: Once you have built the initial seasoning layer, bacon is an option. Just do not confuse cooking bacon with properly seasoning bare steel.
I prefer avocado oil for cooking because it handles griddle temperatures well. Whatever oil you choose, use one suited to the heat you are working with.
Foods I would save for a little later
These are not foods you can never cook on a griddle. They are simply foods that can make a first cook more frustrating than it needs to be.
- Acidic ingredients: Lemons, oranges, and tomatoes can be hard on a young seasoning layer.
- Sticky, sugary sauces: They add another cleanup challenge while you are still learning heat control.
- Delicate fish: If it sticks to a new surface, it can fall apart when you try to turn it.
- Eggs: A new seasoning layer and unfamiliar heat settings can lead to sticking, whether you are scrambling or frying.
- Pancakes: They sound beginner-friendly, but beginners often underestimate how hot the surface gets. Butter burns, batter sticks, and breakfast becomes a cleanup project.
The pancake problem is usually a combination of a new surface and unfamiliar heat. The griddle keeps getting hotter as it preheats, and that knob setting you thought was mild may not be mild at all.
Build some confidence with a straightforward meal first. There is plenty of time for a big breakfast once you understand the surface.
5. Clean Your Griddle in Sections and Finish with a Thin Coat of Oil
Good maintenance begins before the food comes off.
As you get comfortable, learn to cook with temperature zones. One part of the griddle can run hotter for one food while another stays lower for something else.
You will also learn how much heat the steel holds. For some foods, you can turn the burners off near the end and finish with the heat already in the griddle. That is not a substitute for checking doneness, but it helps keep the surface from continuing to burn leftover sugars, proteins, and fats.
Think about an indoor skillet. You can move it off the burner to cool it down. Your outdoor griddle generally stays right where it is, so managing the burners matters.
The four-corner cleaning method
Do not pour water onto a screaming-hot griddle. Let the surface calm down first. Cleaning an excessively hot top with water can contribute to warping.
Then mentally divide the surface into four sections and work through them one at a time:
- Remove the big debris. Add a controlled amount of water to one section and use your scraper to loosen and remove food residue. Repeat around all four sections.
- Make a second cleaning pass. Work through the sections again with water and paper towels to pick up the remaining residue and discoloration. A little color on the towel is not a reason to panic.
- Dry the entire surface. Use fresh towels and make sure no moisture remains. Do not seal moisture underneath an oil coating.
- Apply a small amount of oil. Wipe it across the clean, dry steel in a very thin layer. Once again, less is better.
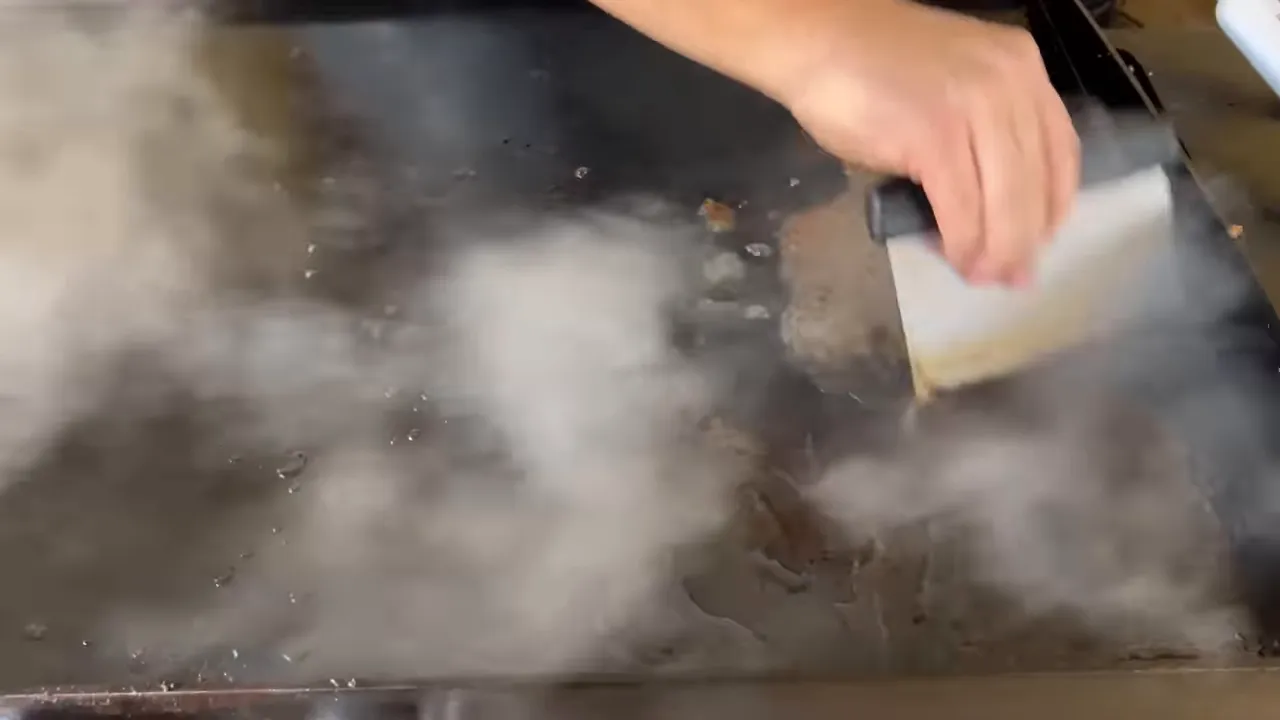
You are removing food residue, not trying to scrape away the seasoning you just built. Working in sections makes it easier to control the water and see which areas still need attention.
For a closer look at the process, our griddle cleaning guide covers the routine and the mistakes to avoid.
Keep It Simple and Keep Cooking
You do not have to master every griddle recipe on day one. Get the basic tools, understand your temperatures, protect the surface from moisture, build thin seasoning layers, and clean up properly after each meal.
The more you use your griddle, the better you will understand its hot spots, its timing, and what works for your favorite foods. Your confidence grows right along with that seasoning.
That is the whole point: better meals, equipment that lasts, and more fun cooking outside. Welcome to the fam.


