These are not beef burgers with a scoop of pulled pork piled on top. The pulled pork is the burger. Take smoky, tender pork, pack it into a ball with its own rendered fat, and smash it onto a hot griddle. That’s where things get good.
You get a deeply browned crust, crispy edges, and a juicy middle, all tucked into a toasted bun. It doesn’t eat quite like a regular pulled pork sandwich, and it doesn’t taste like a beef smash burger, either. It’s its own dang good thing.
The inspiration came from Max the Meat Guy, who formed pulled pork into balls and smashed them with the pork fat. I wanted to take that idea a little further, so we made two versions: a barbecue bacon cheddar burger and an Alabama white sauce burger. Both worked, but one was a home run.
Table of Contents
- What You Need for Pulled Pork Smash Burgers
- Start With a Tender, Smoky Pork Butt
- Shred the Pork, but Keep the Fat and Bark
- Set Up the Griddle and Cook the Bacon
- Toast the Buns and Smash the Pork
- Two Ways to Build Your Pulled Pork Burger
- Which Sauce Works Best?
- The Thermometer I Used for This Cook
What You Need for Pulled Pork Smash Burgers
The most important ingredient is pulled pork that still has its rendered fat mixed in. We are not adding ground beef, eggs, breadcrumbs, or any other binder. This is pork doing all the work.
- Smoked pulled pork, including bark and rendered pork fat
- Burger buns
- Sliced cheddar cheese
- Pickles
- Pickled red onions
- Alabama white sauce or your favorite barbecue sauce
- Bacon, optional for the white sauce version
- Reserved bacon grease for toasting the buns
- Additional seasoning, optional
You’ll also want a griddle, a sturdy spatula, and a burger press. A parchment round between the pork and the press makes it easier to lift the press away after smashing.
There’s no need to get hung up on exact portions here. My pork balls were a little bigger than the usual 2 to 3 ounces you might use for a thin smash burger. You can make singles or stack two patties like we did.
Start With a Tender, Smoky Pork Butt
Cook your pork butt however you like. The smash burger technique is the important part, so if you already have leftover smoked pulled pork, you’re ahead of the game. For a complete starting method, use our smoked pork butt recipe.
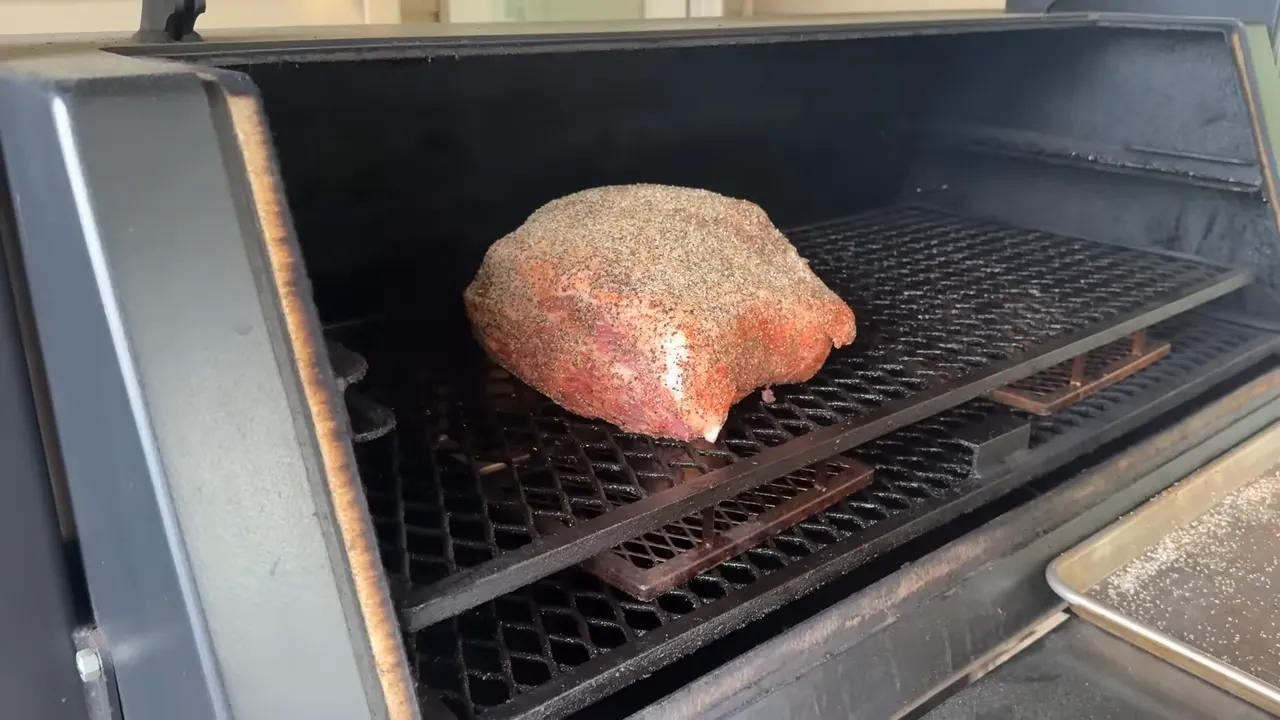
For this cook, I kept the seasoning fairly simple because I wanted the pork to work in more than one meal. Start with a base coat of salt, pepper, and garlic. It’s a big piece of meat, so it can handle seasoning. I followed that with a thin coating of barbecue seasoning on the meat surfaces, leaving the fat cap out of that second coating.
I smoked this pork butt at 225°F for the initial part of the cook. On my smoker, there’s a thick heat plate beneath the grate, so I raised the cooking grate to create a little more separation between the pork and that concentrated heat. That’s a cooker-specific adjustment, but the point matters: know where the strongest heat is coming from.
Add a Little Bath Around the Stall
When the pork reached about 155°F internally, it was getting close to the range where the stall can happen. That temperature isn’t a fixed appointment. Use it as a reason to check the meat, not a rule that every pork butt has to follow.
I put together a loose, eyeballed mixture in a disposable foil pan:
- Apple cider vinegar
- A little hot honey
- About half a stick of butter
- A drizzle of mustard to give the liquid a little body
- Texas Pete hot sauce
- Apple juice
The pork went into that bath and back onto the smoker. At this point, I raised the smoker to around 265°F. You could also finish at 275°F if that suits your cook.
Support that disposable pan. Expanded metal grates can catch thin foil, especially when you slide or lift a pan full of hot meat and liquid. A sheet tray underneath, or a doubled pan, helps keep a little tear from turning into all your cooking juices running out.
Check Tenderness, Not Just the Number
This pork butt took roughly 15½ hours, and the temperature reading at the end was only about 186°F. But when I checked it with a probe, there was practically no resistance going in or coming out.
That was the important test for this particular cook. Don’t treat 186°F as a universal pulled pork target. The meat needs to be tender enough to pull easily, and a single temperature reading doesn’t tell that whole story.
I let the pork rest gradually until it came down to about 150°F before shredding and forming the burgers.
Shred the Pork, but Keep the Fat and Bark
For a regular pulled pork sandwich, you might leave some big pieces of bark together. For these burgers, I want that bark spread throughout the meat so every patty gets some of that smoky, seasoned exterior.
Work through the pork carefully, removing the bone and any unwanted tough pieces. Mix the bark and soft, rendered fat through the shredded meat, but don’t work it until it turns into a paste. There’s a balance between distributing everything and losing all the texture.
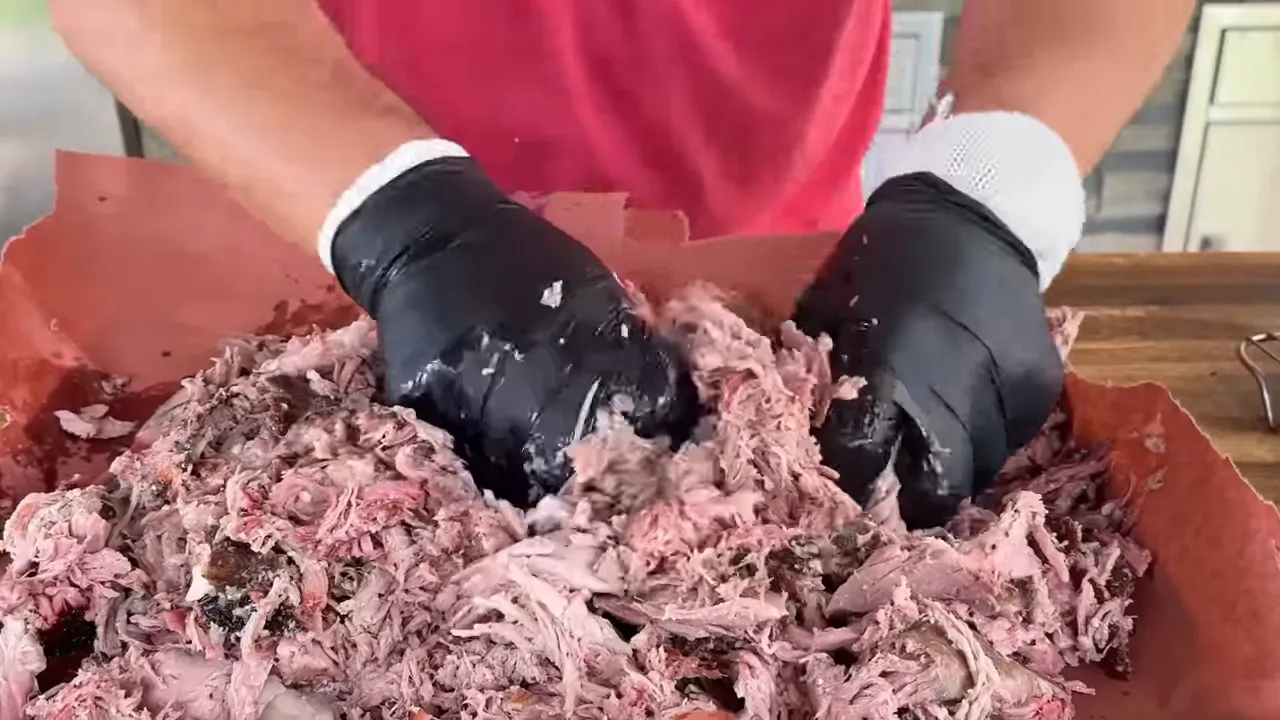
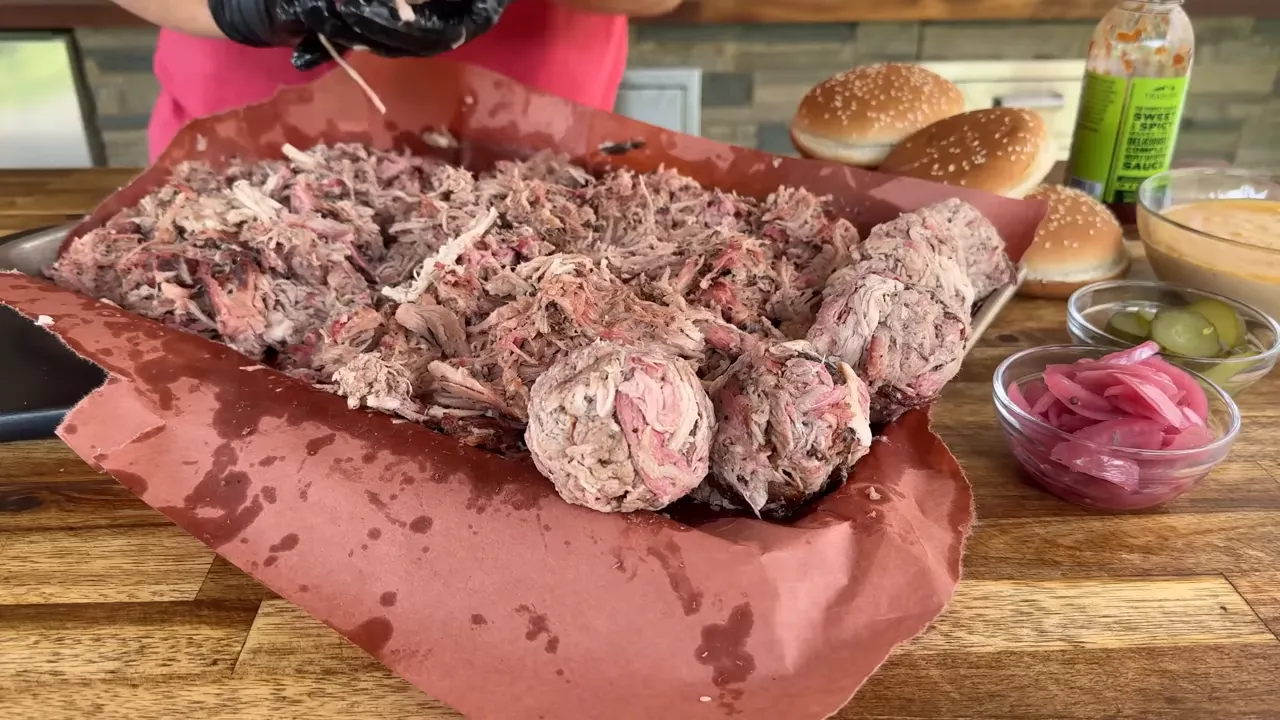
The fat matters here. It keeps the pork rich and juicy as it hits the griddle, and it renders as the patties brown. I didn’t add anything else to the meat before forming the balls.
Grab a portion and squeeze it firmly between your hands until it holds together. You’re making a compact ball, not a loose pile of shreds.
If you’re using refrigerated leftovers rather than freshly cooked pork, handle and reheat them safely. The USDA’s leftover food safety guidance is a useful reference.
Set Up the Griddle and Cook the Bacon
Cook your bacon first, then take it off the griddle and reserve some of that grease. We’re using it to toast the buns, so don’t scrape every bit straight into the grease trap.
Once the bacon is off, scrape away the stuck-on bits and get the surface clean for the pork. You want a clean searing surface, not leftover bacon debris burning underneath your patties.
On my four-burner griddle, I set up the zones like this:
- Two burners at medium-high for searing the pork
- One burner on low for gentler heat
- One burner off because I didn’t need the whole surface running
A Quick Note About Griddle Seasoning
Seasoning isn’t something you do once when a griddle is new and never think about again. Those layers come and go as you cook and clean.
After the bacon, my already-seasoned surface had a thin film of fat that began smoking as the griddle heated. That’s an opportunity to build another layer. I don’t recommend bacon grease as the starting point for seasoning a brand-new griddle, but cooking on an established surface can continue adding to it.
You have three opportunities to maintain seasoning: before cooking, during cooking, and after cleaning. The key is a thin layer on a clean surface, heated enough to smoke off. If you do that before cooking, bring the griddle back down to the heat you actually need before adding food.
Toast the Buns and Smash the Pork
Spread a little reserved bacon grease over the bun-toasting area and set the buns cut side down. Pull them when they have a nice golden toast.
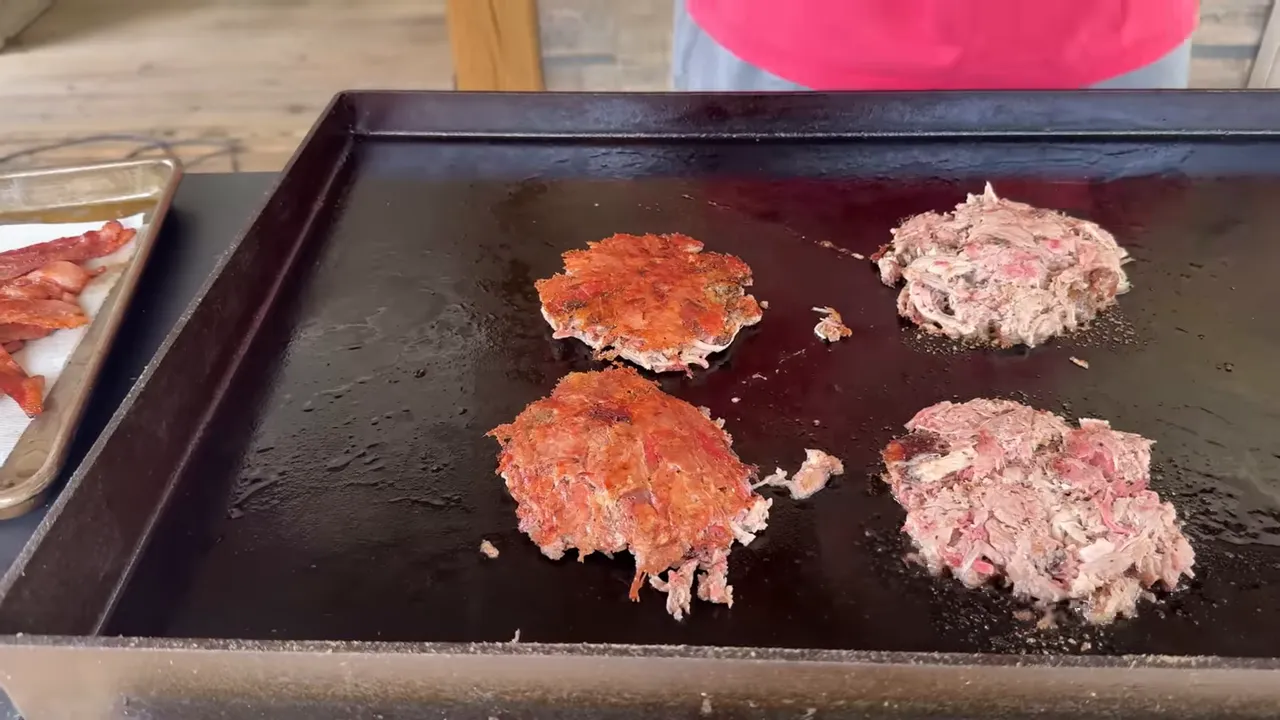
Now put the compact pork balls onto the medium-high searing zone. Give yourself enough room between them to smash each one flat.
- Place a parchment round over a pork ball.
- Press firmly with the burger press to flatten it into a patty.
- Lift the press and peel away the parchment.
- Let the pork sear until the underside has developed a substantial crust.
- Work a sturdy spatula underneath, keeping that crust attached, and flip.
- Let the second side brown while you add your chosen toppings.
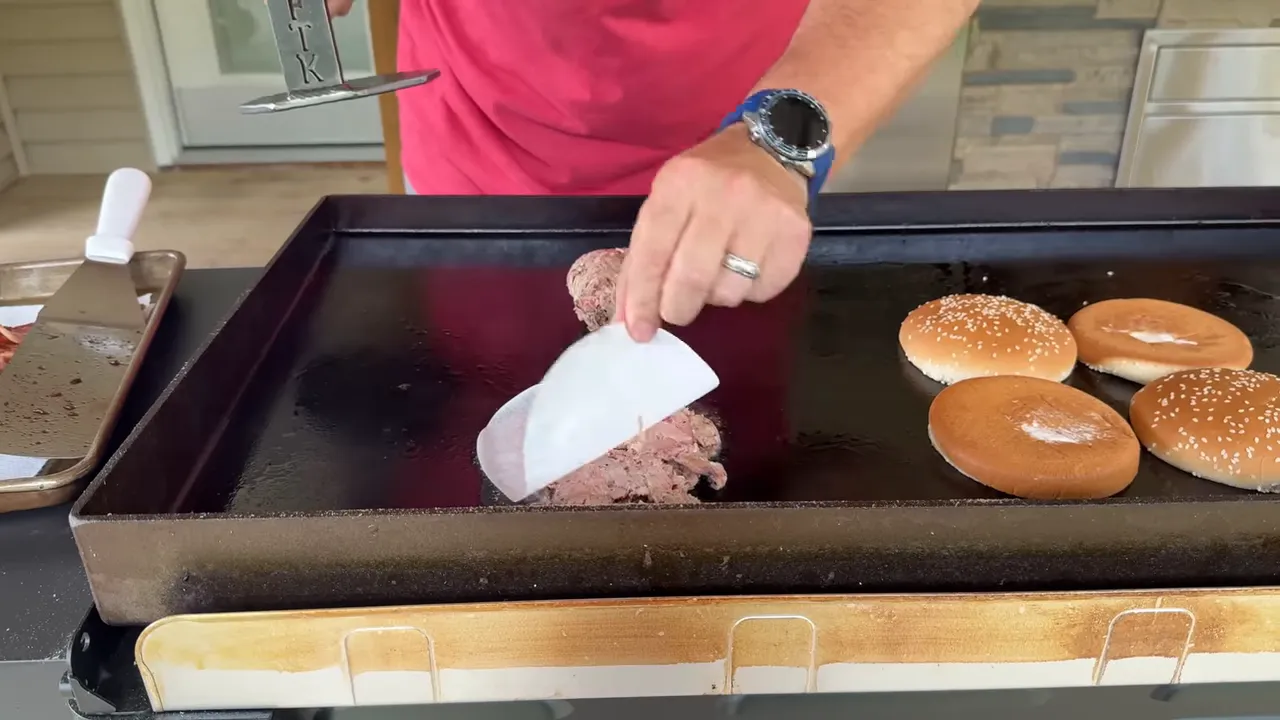
Don’t worry about making these paper-thin. Mine were a little more substantial, and they still developed a fantastic sear as the pork fat rendered.
That first flip is the moment that sells the whole idea. You start with a ball of soft pulled pork and end up with a crisp, browned surface that looks completely different.
Two Ways to Build Your Pulled Pork Burger
Barbecue Bacon Cheddar
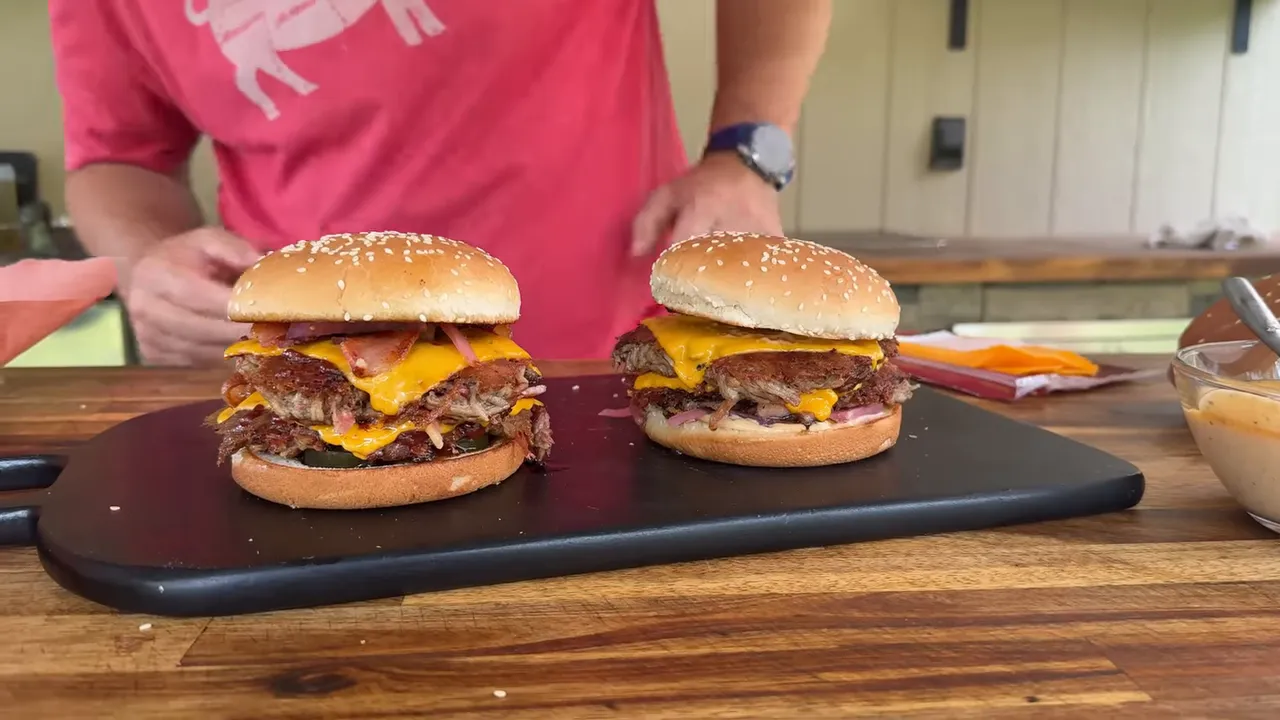
After flipping the patties, add a little barbecue sauce to the seared side, followed by cheddar and cooked bacon. You can add a touch more seasoning if your pork needs it, but taste and use some judgment. The bark is already bringing plenty of flavor.
Dress the toasted bun with barbecue sauce, pickles, and pickled red onions. Stack on the cheesy bacon-topped pork patties and close it up.
This is a big, rich burger, and it benefits from enough sauce to carry through all that meat. If you go light on sauce, keep a little extra nearby for dipping.
Alabama White Sauce and Cheddar
For the second version, sear and flip the pork the same way, then add cheddar. Dress the toasted bun with Alabama white sauce, pickled red onions, and pickles.
We used our adjusted homemade white sauce, which we had thickened and toned down from an earlier version that was too thin and vinegary. You want that tang, but you still want a sauce that sits nicely on a burger.
I left the bacon off this one to give it a different direction. You can certainly add it, but honestly, I didn’t feel like it needed it.
Which Sauce Works Best?
The barbecue bacon cheddar version was good. You get the crisp pork, smoky bacon, melted cheese, and plenty of richness. But with our particular combination of barbecue sauce and onions, the sweetness started taking over.
The Alabama white sauce version was the winner for us. The vinegar tang balanced the rich pork better, and the whole bite felt more complete. Pickles, onions, cheddar, crispy pork, and that sauce all worked together.
And don’t mistake the crispy exterior for dry meat. These patties were juicy from the pork’s own fat. The sauce was there for flavor and balance, not to rescue dried-out pork.
That’s another good reason to make a pork butt. Save some pulled pork, keep the rendered fat mixed in, and give it the smash burger treatment. The white sauce version, especially, is a home run.
The Thermometer I Used for This Cook
Typhur sponsored this cook, and the Sync Gold Series is a thermometer I regularly use. It has manual and smart cooking modes, app monitoring, and a temperature display right on the base. That last feature sounds small, but I like being able to walk out to the smoker and check the temperature without remembering my phone.
The probes are waterproof and can be washed after cooling. Insert the probe to its marked minimum depth, and follow the manufacturer’s limits for your cooking setup. After this long pork butt cook, mine still showed about half its battery remaining. You can check the current offer through the link below.


