A smash burger ought to have a deep brown crust, thin, lacy edges, and plenty of juicy beef underneath. If yours comes off the griddle gray, dry, torn apart, or big enough to hang halfway off the bun, something in the technique needs a little work.
The good news? You do not need every griddle gadget on the market to make a great burger. You need the right heat, good contact with the flat top, and a little confidence with your spatula.
These are the six common smash burger mistakes I see beginners make, along with the fixes that make the biggest difference. Then we’ll put it all together with an old-school double cheeseburger on toasted white bread. Because sometimes that plain sliced bread makes one heck of a burger.
Key Takeaways
- A thoroughly heated griddle builds crust quickly without forcing you to overcook the beef.
- Smash evenly and hold the initial press for about 10 seconds to establish good contact.
- Scrape underneath the browned crust so it stays attached to the burger during the flip.
- Prepare toppings ahead and practice with one patty before cooking larger batches.
Table of Contents
- Start With Consistent, Loosely Packed Beef Portions
- 1. Your Griddle Is Not Hot Enough
- 2. You Are Not Smashing the Burger Evenly
- 3. You Are Flipping Too Soon
- 4. You Are Leaving the Crust on the Griddle
- 5. You Are Cooking the Burger Too Long
- 6. Your Ball of Beef Is Too Big
- Put It Together: An Old-School Double Smash Burger
Start With Consistent, Loosely Packed Beef Portions
I’m using 80/20 ground beef. Before worrying about the smash, get your portions reasonably consistent so each burger behaves about the same on the griddle.
If you do not have a scale, a standard 1/3-cup measuring cup is a handy starting point. Use it to portion the beef, then gently roll each portion into a loose ball. It is a simple way to get close without buying another tool on day one.
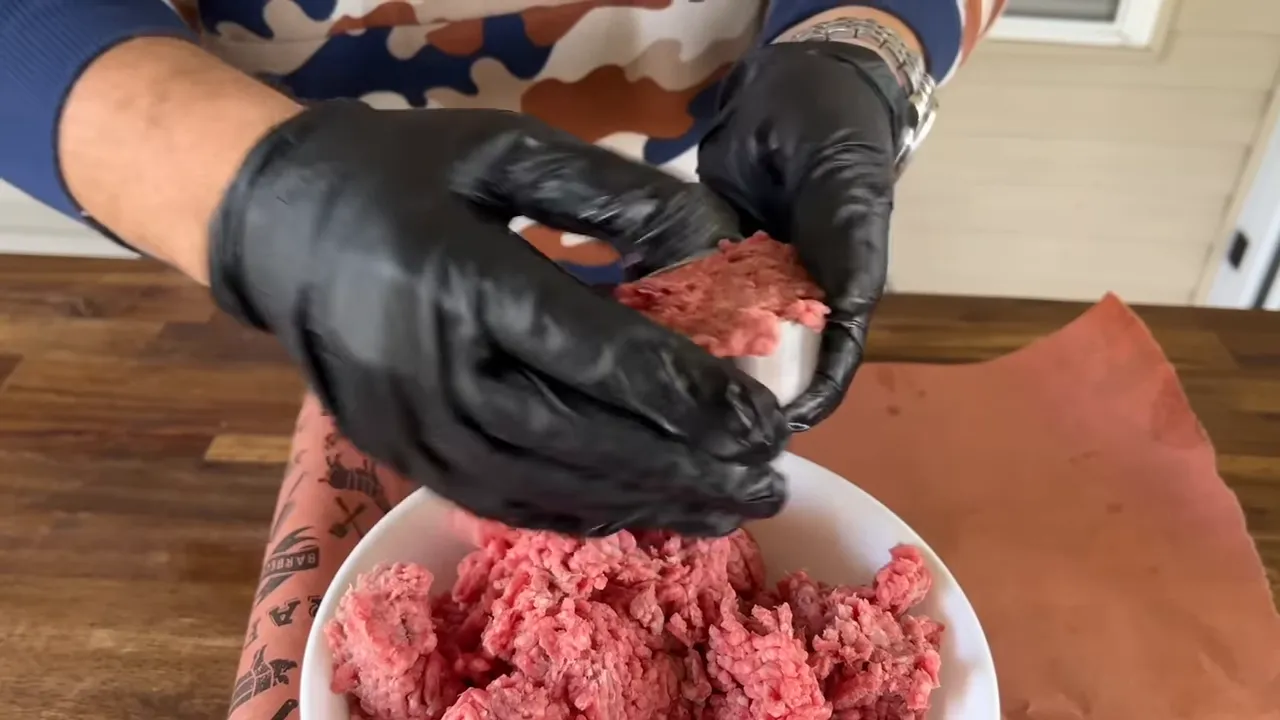
Do not squeeze those balls into tightly packed little meat rocks. The harder you work and compact the beef, the tighter the texture becomes. A loose ball spreads more easily and helps you get those irregular, lacy edges we’re after.
Have your portions ready before you start cooking. Once the beef hits a properly heated flat top, things happen fast.
1. Your Griddle Is Not Hot Enough
This is one of the biggest reasons a smash burger does not develop a good crust.
A cold or underheated griddle cooks the beef without giving you that immediate sear. You can leave the patty there longer, but now you’re chasing browning while the inside keeps cooking. By the time the outside looks better, you may have already dried out the burger.
You want enough surface heat to build the crust quickly. A useful target for this cook is about 425 to 450°F on the griddle surface, not an internal meat temperature.
An infrared thermometer helps you check the flat top, but you can also learn a lot from how the burger reacts. Pay attention to the immediate sizzling and, more importantly, the color you get after the first flip.
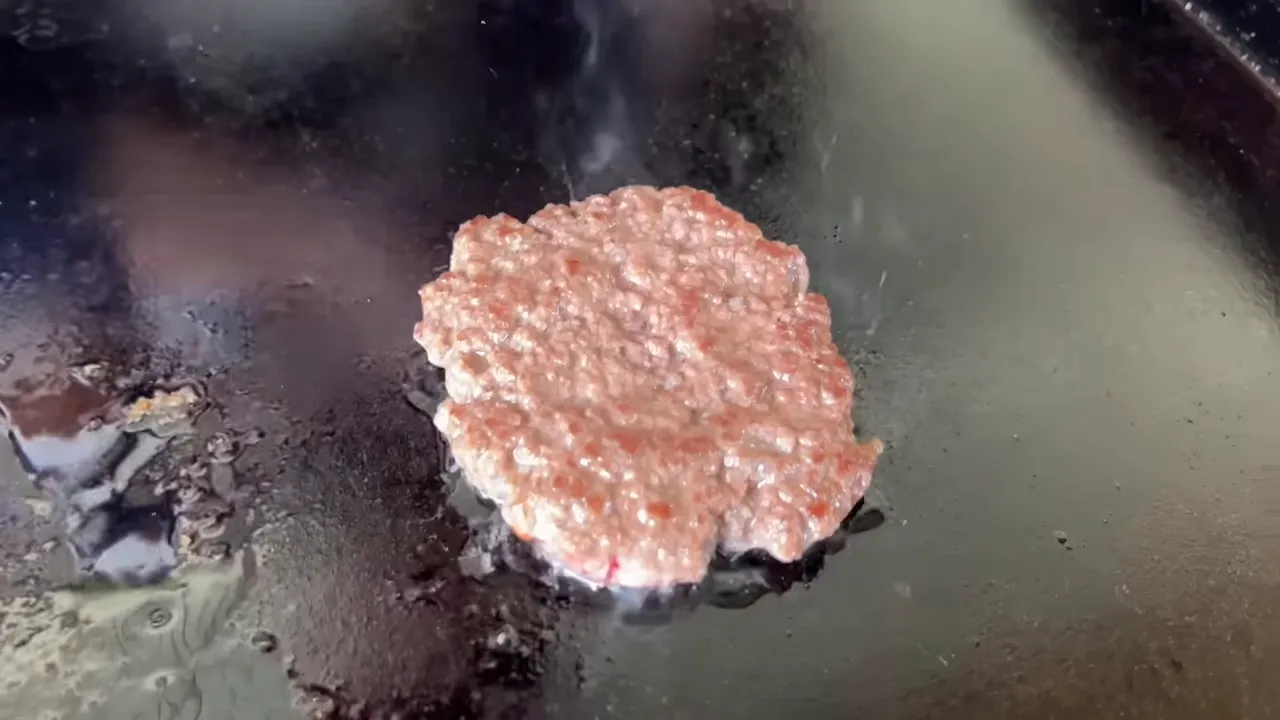
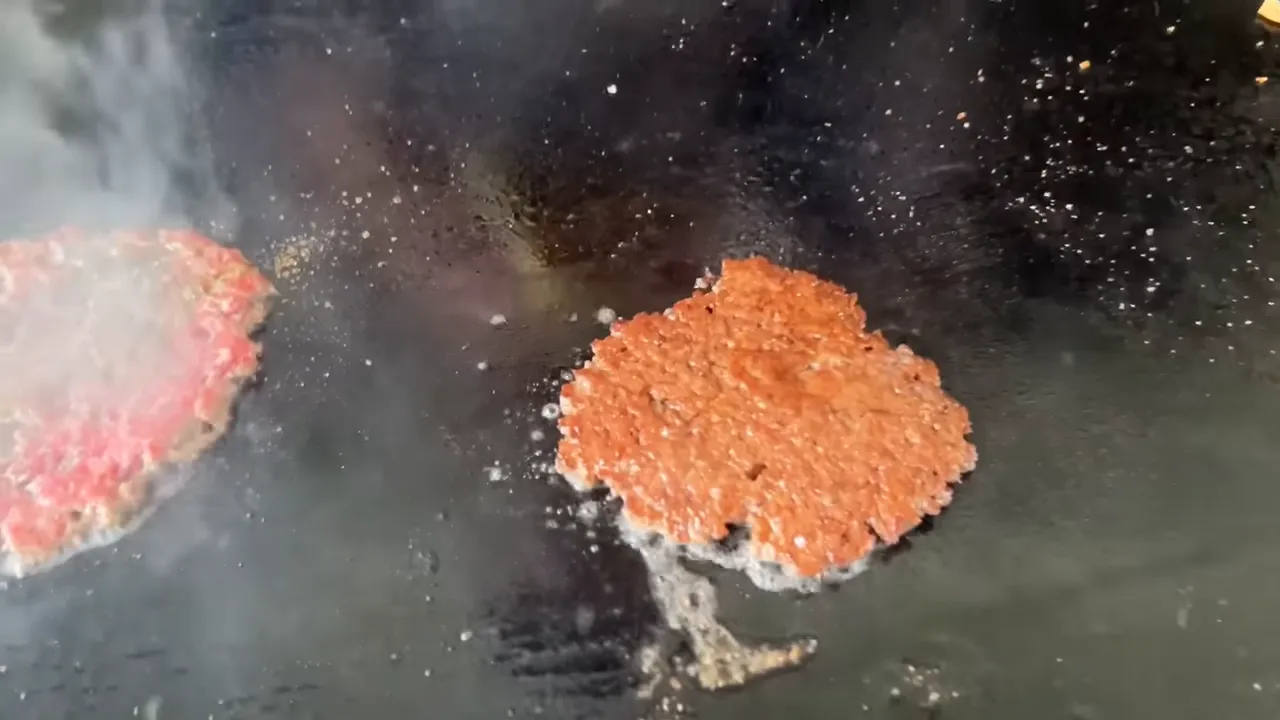
The underheated example still has moisture, but it lacks the deep browning that makes a smash burger taste like a smash burger. That browning is the Maillard reaction, and it is a big part of the flavor we’re trying to create.
Get to know your particular griddle. Burner count, heat output, and hot spots all affect how it cooks. The goal is not simply to turn on the burners. It is to give the cooking surface time to heat thoroughly enough to handle the cold beef.
2. You Are Not Smashing the Burger Evenly
Putting a press on the beef, giving it a quick push, and lifting it straight back off can leave you with uneven contact. You might get a thin center, a thick lip around one side, and patches that never brown as well as the rest.
The fix is what I like to call even smashage. Very technical culinary term right there.
- Place the beef ball on the hot griddle.
- Lay a piece of parchment paper over it.
- Press the beef into a thin patty.
- Work the press around slightly so the edges flatten evenly instead of leaving a thick ridge.
- Once the shape and thickness look right, hold firm pressure for about 10 seconds.
- Lift the press and remove the parchment.
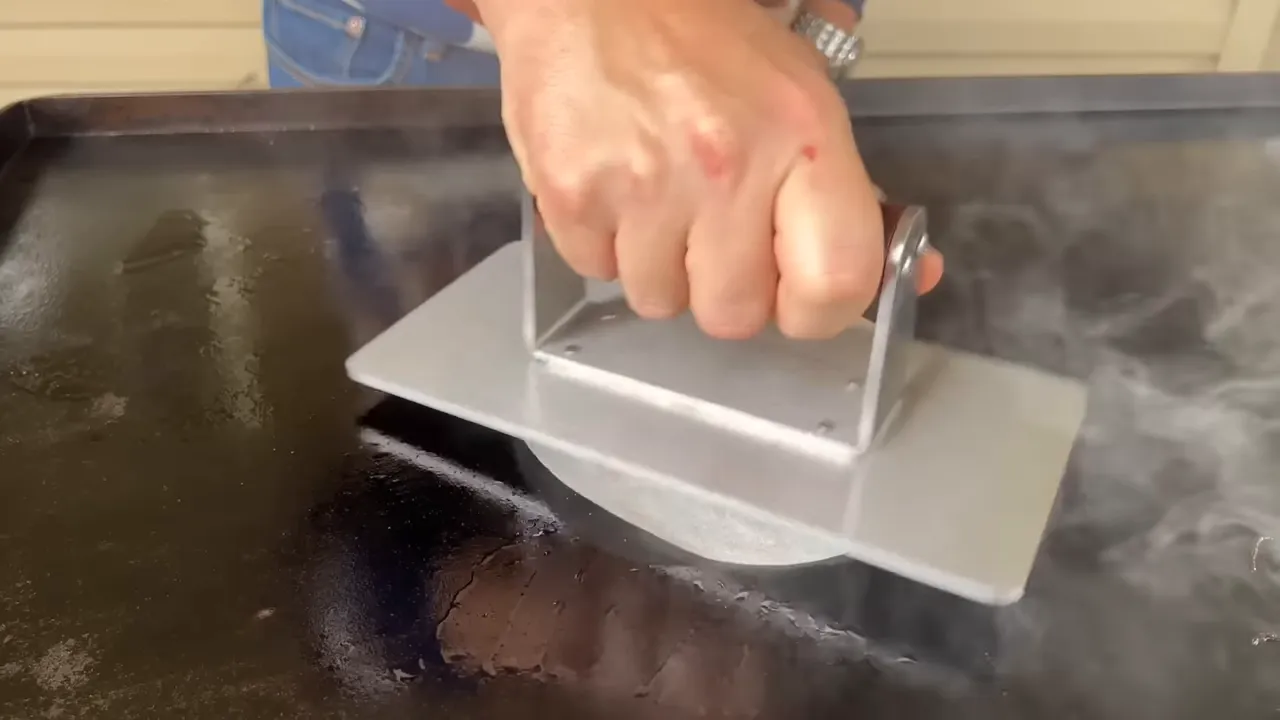
The point of holding that initial press is to establish solid contact across the patty. Good contact gives the beef a chance to brown evenly from edge to edge.
You can cut parchment from a roll into squares or circles, or use precut rounds. I use 6-inch rounds here. Either way, the paper helps keep the raw beef from sticking to the press.
If your finished burger has dark patches beside pale patches, or a thicker section that cooks more slowly, take a look at your initial smash. Small differences in thickness matter with a burger this thin.
3. You Are Flipping Too Soon
Maybe your portions are right. Your griddle is hot. You even nailed the smash. Then you get nervous about overcooking it and flip before the crust has developed.
That is a different problem from insufficient heat, but the result can look similar: a burger without that rich, even browning.
Let the beef fry in its own rendered fat and develop the crust. Do not rush it just because it is thin.
As it cooks, look for browning around the edges and that lacy appearance beginning to show through the thin spots. The top may still have pink or red areas when the underside is ready to flip. You are not waiting for the whole top to look completely cooked before turning it.
Those are cooking cues, though, not a food-safety test. For safe doneness, the USDA recommends cooking ground beef to an internal temperature of 160°F, checked with a food thermometer.
There is a balance here: give the first side enough time to develop flavor without leaving the burger so long that it dries out. Learning that window is why I recommend practicing with one patty at a time.
4. You Are Leaving the Crust on the Griddle
You can do everything right up to the flip and still lose the best part of the burger.
A properly smashed patty adheres to the griddle as it browns. Even with a well-seasoned flat top and plenty of rendered fat around it, you cannot assume the burger will slide free by itself.
If you push the spatula through the meat instead of getting underneath the crust, the patty can tear apart while that beautiful browned layer stays stuck to the cooking surface.
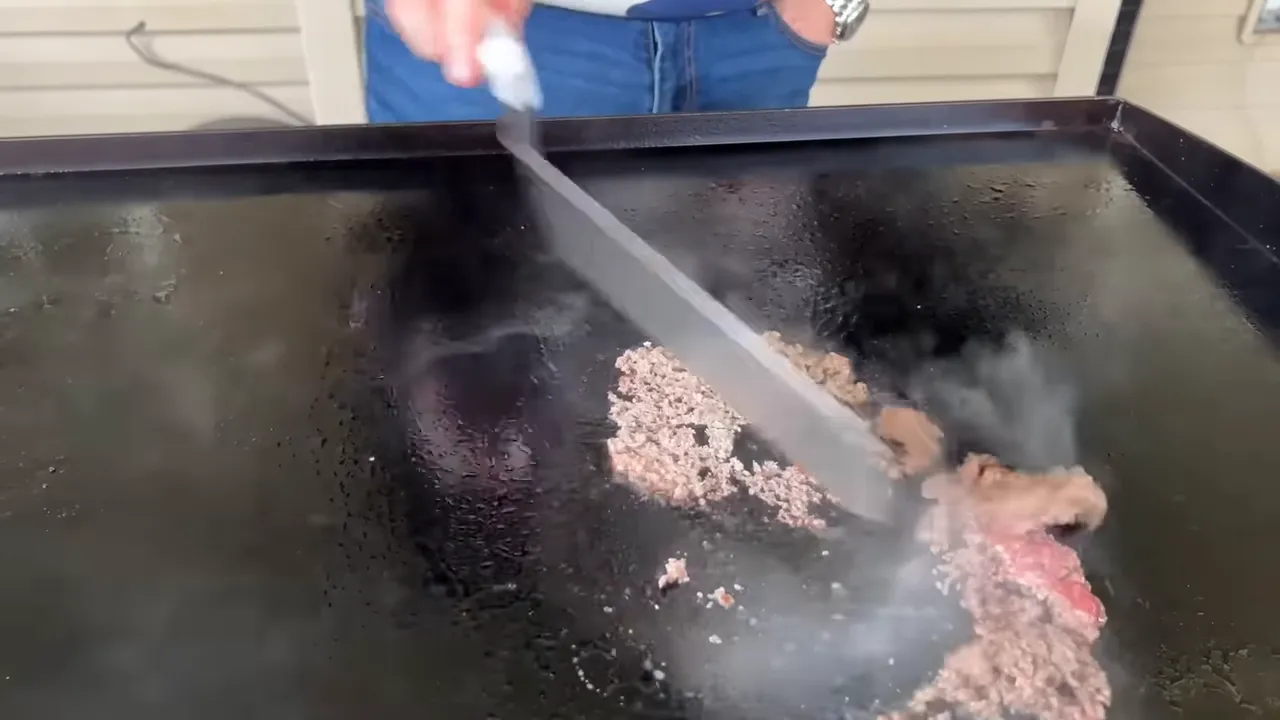
Use the spatula to release the crust, not just lift the meat. Come in from the side at an angle that gets the blade underneath the browned layer while keeping it controlled against the flat top.
You are scraping under the patty, not chopping down through it or gouging the griddle. Work the blade beneath the crust, get the burger supported, and then flip.
A suitable griddle spatula makes this easier, but the tool still needs your help. The goal is to bring all that browned goodness with the burger. That color belongs on your sandwich, not in the grease trap.
5. You Are Cooking the Burger Too Long
A juicy smash burger is absolutely possible. A thin burger left on the heat while you hunt for cheese, open the mayonnaise, and figure out where the buns went? That is a different story.
The window is small because the patty is so thin. You can have the right heat, a good smash, and the correct scraping technique, then lose the burger simply by taking too long.
Have Your Whole Setup Ready
Before the beef goes down, know the answers to these questions:
- Are the buns or bread getting toasted?
- Is the cheese open and within reach?
- Which condiments and toppings are you using?
- Where will you assemble the burgers?
- If you are feeding a group, how will people get their food?
Prep work is part of cooking a good smash burger. You do not have much spare time once the patties are on the flat top.
Practice Small Before Feeding a Crowd
Please do not invite 40 people over for your very first smash burger attempt and expect burger heaven.
Start with one single patty at a time. Learn how hard to press, how thin to make it, how quickly it browns, and what it feels like to scrape underneath the crust.
Some beginners barely press because they are afraid of making the burger dry. Others press like they are trying to push the beef through the flat top. A little practice helps you find the middle ground.
Even on a 36-inch griddle, more than four smash burgers at once would be hard for me to manage at the pace I like while keeping the quality where I want it. Available cooking space and a manageable workload are not the same thing.
6. Your Ball of Beef Is Too Big
It is tempting to start with a big ball of beef because you want a big, meaty, juicy burger. But a smash burger needs to be thin.
With too much meat, you end up choosing between two problems:
- Leave it thick: You lose the thin patty that makes this style of burger work.
- Smash it thin: It spreads into a huge patty that does not fit a normal grocery-store bun.
The oversized example spreads beyond the 6-inch parchment round. You can still brown it and flip it, but that does not mean it is a practical size for the sandwich.
If you want a bigger burger, make two smaller, thin patties and stack them. You get a substantial burger without giving up the crust and texture you wanted in the first place.
Put It Together: An Old-School Double Smash Burger
Once those mistakes are out of the way, the actual burger can stay simple. Use the ingredients you like. For me, this one is about toasted white bread, two thin patties, melted cheese, mayonnaise, yellow mustard, and pickles.
Growing up, sliced white bread did a little bit of everything in our house. Hamburger bun, hot dog bun, dinner bread, toast and gravy. So bringing it back for a burger just makes sense to me. A regular hamburger bun works fine, too.
What to Have Ready
- Two loosely formed portions of 80/20 ground beef
- Two slices of white bread, or a hamburger bun
- Two slices of cheese
- Your preferred beef seasoning
- Mayonnaise
- Yellow mustard
- Pickle chips
- Parchment paper, a burger press, and a griddle spatula
Cooking and Assembly
- Start the bread. Lightly toast one side of each slice, then move it away from the main cooking heat. Save the other side for the rendered beef fat later.
- Give the beef room. Set the two balls on the hot griddle with enough space to spread into thin patties. Plan for roughly a 6-inch footprint rather than crowding them together.
- Smash evenly. Cover with parchment, flatten the beef, work around the edges, and hold the initial press for about 10 seconds. Remove the paper.
- Season with restraint. These patties are thin enough that seasoning one side is typically plenty. Do not automatically season them like a thick burger.
- Build and preserve the crust. Let the first side brown, then scrape beneath the entire patty and flip. Look for even browning across the surface.
- Add cheese immediately. Have it ready so it can start melting while the second side finishes cooking.
- Finish the bread. Toast the remaining side in some of the rendered beef fat, keeping an eye on it.
- Stack and assemble. Once cooked through, stack the patties, spread mayonnaise on one slice of bread and mustard on the other, then add the beef, cheese, and pickles.
Learn your griddle’s hot and cool zones so you can move the bread or finished burger away from intense heat when needed. That buys you a little control during assembly, but it is not an invitation to leave thin patties sitting around.
If you are making another batch, let the flat top come back up to temperature before adding more cold beef. Otherwise, a good first batch can turn into a pale second batch.
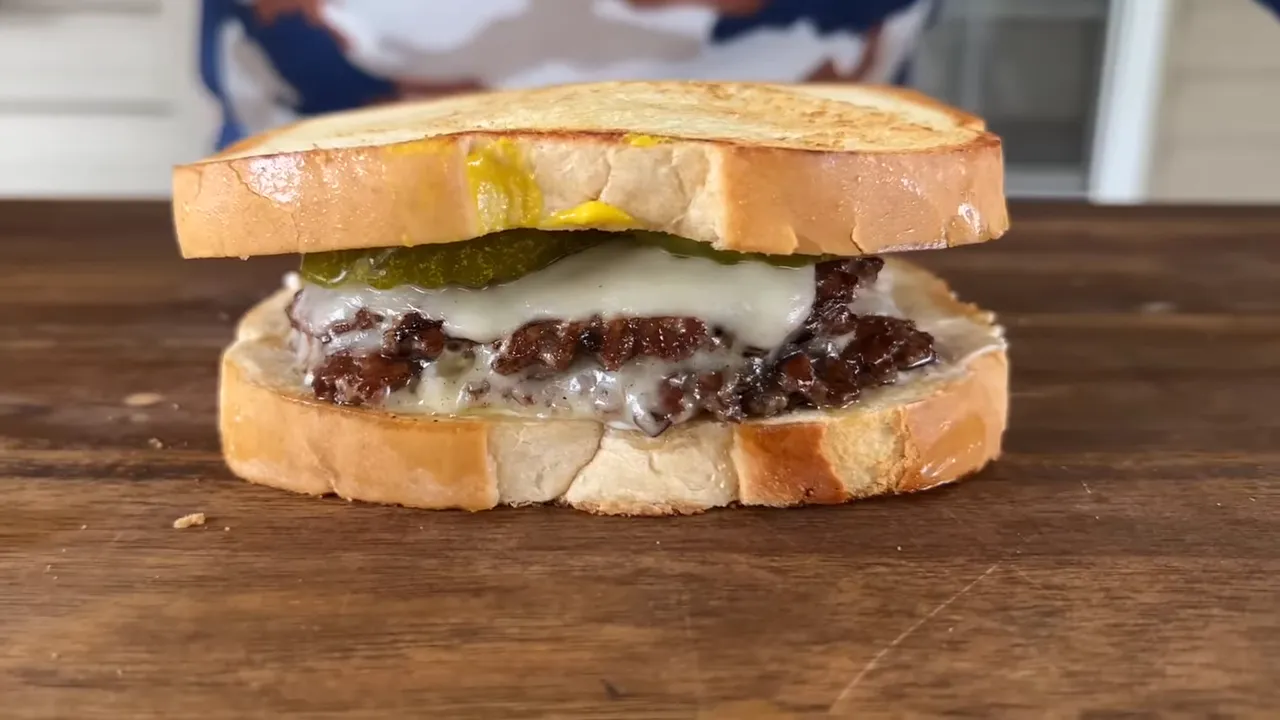
That is a smash burger done right: browned beef, melted cheese, a little crunch from the pickles, and bread that does its job without getting in the way.
The toppings are yours to change. The method is what matters. Get the griddle hot, smash evenly, give the crust time to form, scrape it up properly, and keep your cooking pace under control. Those little techniques make a big difference in the burger you put on the plate.


