Give me a griddle that can actually cook on low, heat evenly across the plate, and still put a good sear on a steak, and you’ve got my attention. After about a month of cooking on the Solo Steelfire 30-inch griddle, I’ve got to tell you: this thing is right up there with my favorites.
And I haven’t just fired it up once or twice. We’ve cooked bacon, eggs, burgers, steaks, rice, and more. The stainless steel cooking surface has been much easier to use than I expected, and the temperature control is what really sold me.
Disclosure: Solo sponsored this review. That said, these opinions come from a month of actual cooking, including the things I love and the details I’m still a little skeptical about. Trust matters to me, and a sponsorship doesn’t change that.
Quick Summary
- The Steelfire delivered gentle low heat and notably even browning across the cooking surface.
- Independent burners created useful hotter and cooler zones, with some heat crossover through the plate.
- The stainless steel top released food easily without requiring a seasoned cooking layer.
- The heavy plate and potential cleanup challenges are the main trade-offs from the first month.
Table of Contents
- Starting From the Ground Up: The Stand and Everyday Features
- A Hood You Can Actually Use While Cooking
- The Burner Design Is a Big Part of the Story
- The Bread Test: Low Really Means Low
- Cooking on Stainless Steel Was Easier Than I Expected
- A Steak Dinner Put the Temperature Range to Work
- Cleanup: A Little More Scrubbing, a Lot Less Seasoning Maintenance
- Stand, Tabletop, and Taking It Somewhere
- My Verdict After a Month With the Solo Steelfire
Starting From the Ground Up: The Stand and Everyday Features
Solo is already known for its smokeless fire pits and pizza ovens. Now it has entered the griddle market, and the Steelfire carries over some of that familiar rounded styling and perforated metalwork.
Looks are one thing. How it works on the back deck is what matters.
Four locking swivel casters
The stand has four locking swivel caster wheels, and that’s an immediate plus for me. We move our outdoor cooking equipment around a ton. Having all four wheels swivel makes the griddle easy to reposition instead of wrestling one end around.
A fabric panel with a question mark
The front of the stand uses a fabric panel secured with bands rather than a solid enclosure. It gives the stand a different look and helps keep the design simpler, but I do have a concern about long-term cleanup.
What happens when rain splashes mud onto it? What about grease? I haven’t had enough time to answer those questions. The panel is mainly aesthetic, though. It isn’t what gives the stand its structure, so this isn’t a cooking-performance issue.
A reusable grease tray
The grease tray pulls out from the front, underneath the controls. There’s no disposable liner required, which I kind of like. I get tired of buying liners when I can just empty and clean the tray.
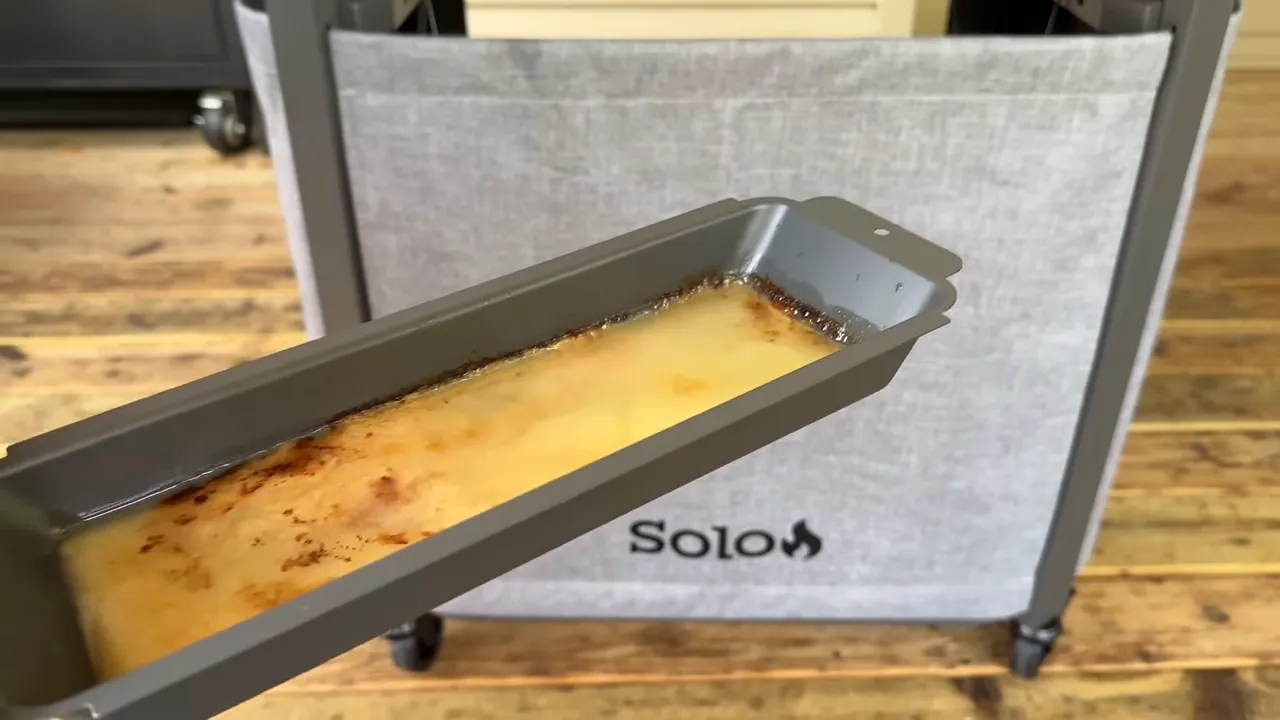
One important caution: hot grease makes that tray hot, too. Don’t treat it like a cool drawer while the griddle is running. Let it cool before emptying and cleaning it.
Folding side shelves and easy tank access
Both side shelves fold down and lock into their raised position. Their perforated pattern matches Solo’s styling, but all those little holes could make a food spill more tedious to clean.
That hasn’t been a problem for us because we normally set a tray on the shelf. It’s simply something to consider if you tend to put ingredients directly on your side tables.
Around the back, the propane tank is easy to reach. No digging through a cramped cabinet just to get to it. Between that access and the swivel wheels, moving and operating this setup has been straightforward.
A Hood You Can Actually Use While Cooking
This is a feature I was very happy to confirm with Solo: you can close the hinged hood while the Steelfire is operating.
Some griddle lids are only there to protect the cooking surface between meals. I’ve always felt that’s a missed opportunity. If the lid is already attached, being able to use it during cooking makes it much more useful.
On the Steelfire, lowering the hood also helps speed up preheating. There’s one practical trade-off, though: if one burner is high and the other is low, closing the hood traps heat over both sides. You’re blending the cooking environment, so don’t expect the same separation you get with the hood open.
The Burner Design Is a Big Part of the Story
The Steelfire has two independently controlled burners with high, medium, and low settings. Ignition is built into the controls, with no ignition batteries to replace.
Underneath the heavy stainless steel plate, the burners have a distinctive shape. Solo calls them RaceTrack burners. Instead of concentrating flame along a simple straight path, their layout extends around the outer portions and through the middle of each burner area.
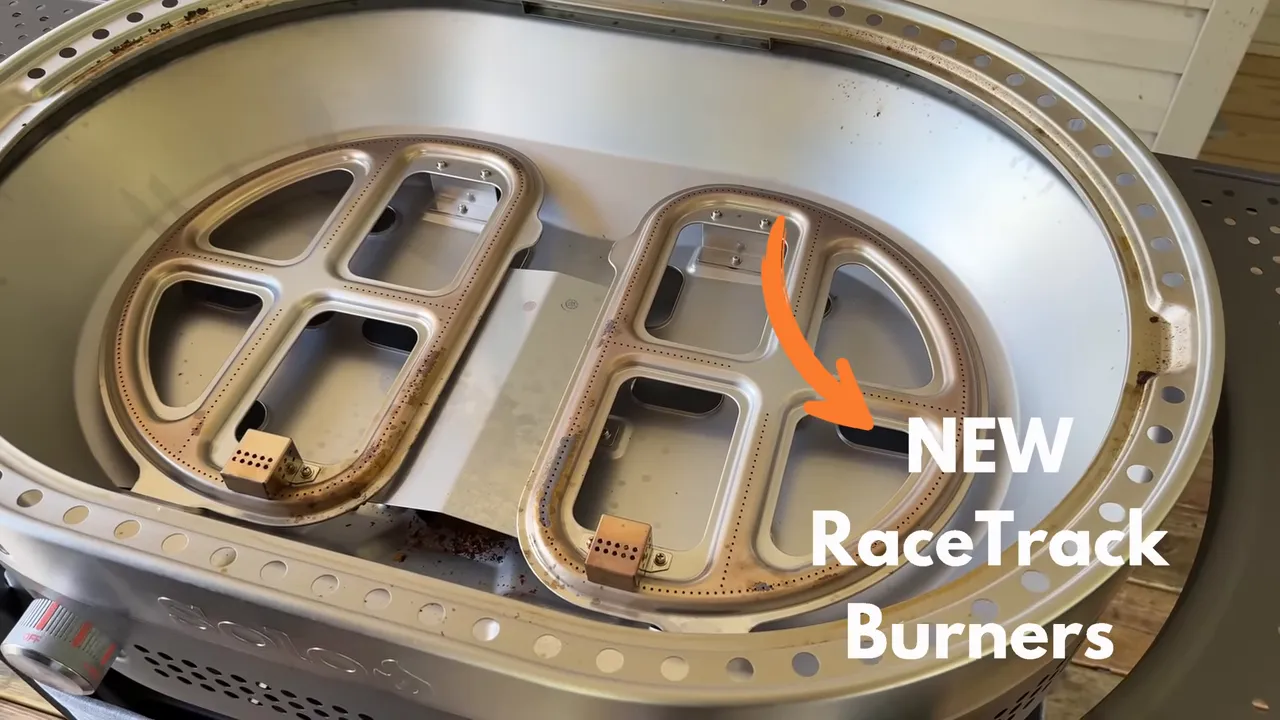
That layout has translated into some of the most even griddle cooking I’ve experienced. I’m not saying that just because the burners look different. It showed up in our meals and in the bread test.
The other thing I like is the actual difference between the low and high flames. On some griddles, turning the knob doesn’t seem to change much. If the flame barely changes, it’s no surprise when the cooking temperatures don’t change much either.
Here, low produces a noticeably gentler flame than high. That gives the controls a useful range instead of just different labels around a knob.
Why I didn’t rely on an infrared temperature gun
A shiny stainless steel surface doesn’t read like a dark, seasoned steel plate with a typical infrared temperature gun. Its reflectivity and emissivity can make those readings misleading, so I wouldn’t trust an ordinary point-and-shoot reading here without accounting for the surface.
For more background on that limitation, ThermoWorks provides information about surface measurement and emissivity with its infrared thermometers. For this review, I put more weight on the cooking results and the browning pattern across the plate.
The Bread Test: Low Really Means Low
You know I’m a big believer in a griddle having a good low setting. Getting hot is only part of the job. Being able to cook gently without burning everything in the middle is just as important.
For the first test, I covered the cooking surface with slices of bread and ran both sides on low. I didn’t trim bread to fit every curve. The point was to see how the surface behaved across the main cooking area.
After roughly 13 minutes, the bread was lightly toasted rather than scorched. More importantly, there wasn’t a black patch in the center surrounded by barely cooked bread.
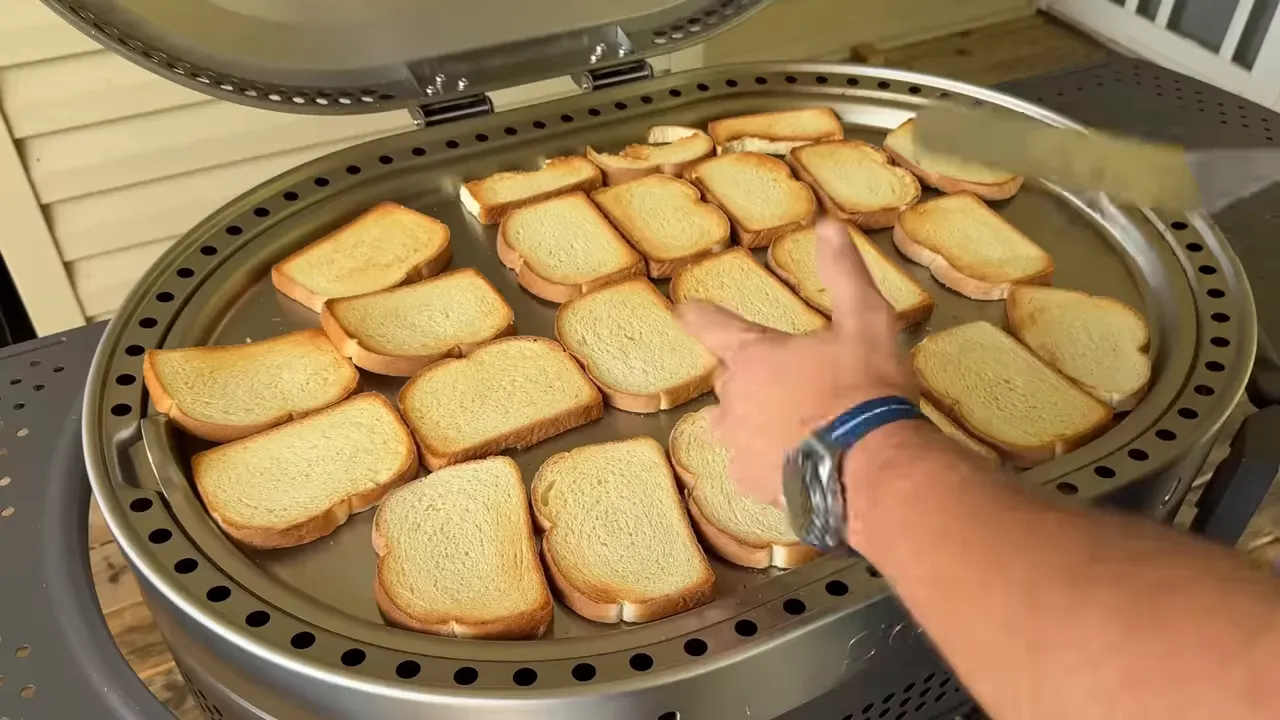
Was every slice absolutely identical? No. We noticed a small variation near the grease opening. But across the plate, this was an excellent result.
I’ve cooked on plenty of griddles where low still turns the middle black after ten minutes. Then the advice is that you just have to learn to cook around it. I’d rather have a griddle that lets me use the surface in the first place.
The light color was the result I wanted. This wasn’t a race to burn toast. It was a test of whether the griddle could hold a gentle, usable low heat, and it did.
Turning one side high: Does two-zone cooking work?
Next, I left one burner on low and turned the other to high. After giving it more time, the bread showed a clear difference between the two sides.
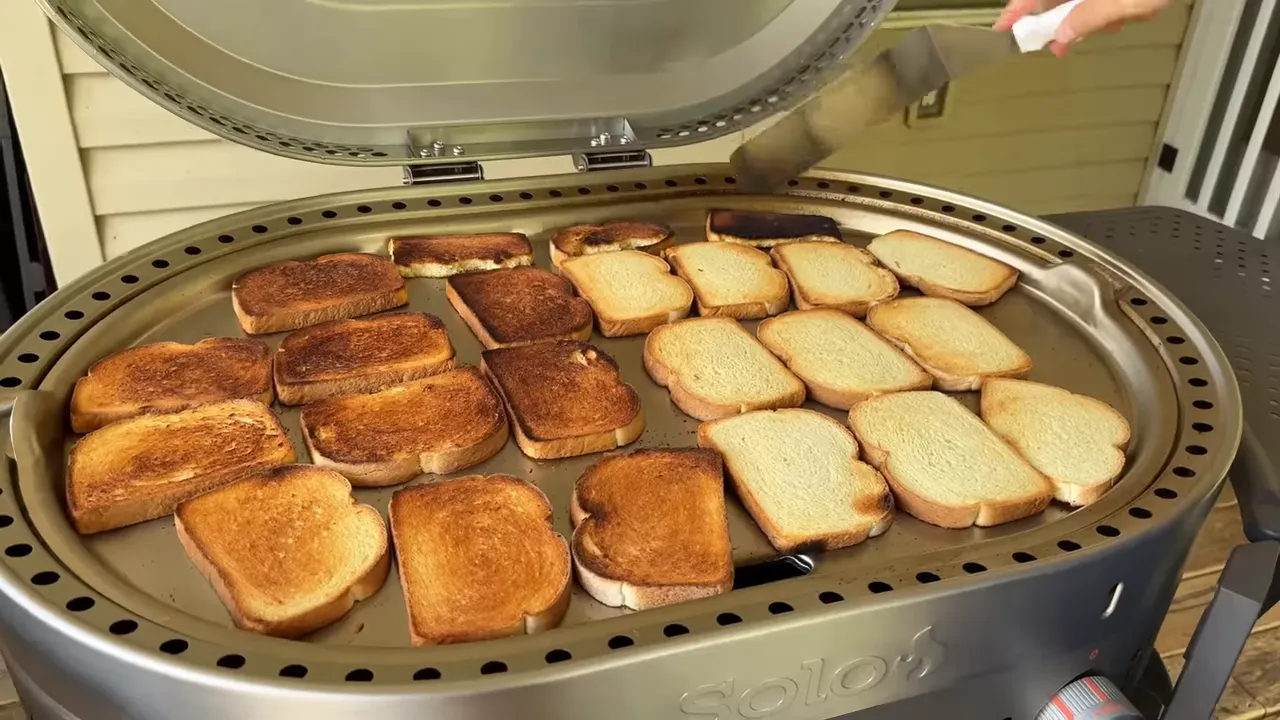
Some bread got burned during that second stage, but making good toast wasn’t the goal. I wanted to see whether changing one burner produced a meaningful change across that side of the plate.
It did. The browning grew darker toward the hotter zone, with some heat bleeding across the middle. That crossover is part of cooking on a shared metal plate. What matters is that the controls still gave me a useful hotter side and cooler side.
Cooking on Stainless Steel Was Easier Than I Expected
Solo describes this as a commercial-grade stainless steel cooking surface, and the feel of it takes me closer to my commercial kitchen days than a lot of backyard griddles do.
The plate is heavy. But the surprise wasn’t the weight. It was how easily food released.
If you’ve ever fought with a brand-new stainless steel skillet indoors, you might expect a learning curve. I certainly expected more sticking than we experienced. Instead, bacon and eggs moved around easily, and the other meals we cooked were similarly user-friendly.
That doesn’t turn stainless steel into a nonstick coating. It simply means that in our actual cooking, the surface was far less fussy than I anticipated.
Heat-up has also been quick. Solo’s stated claim is about 35% faster heating, but I didn’t run a controlled comparison to verify that percentage. What I can say is that, in our steak cook, it went from a cold start to searing heat in about seven minutes.
A Steak Dinner Put the Temperature Range to Work
A bread test is useful, but dinner is where the controls have to earn their keep. We cooked a steak with steamed broccoli and sautéed mushrooms and onions, all on the same surface.
Here’s how I used the zones:
- Set the steak side around medium to medium-high. It had enough heat to develop a nice sear without needing to run everything flat out.
- Keep the vegetable side cooler. A light touch of oil gave the mushrooms, onions, and broccoli their own working space.
- Season the vegetables simply. Salt, pepper, garlic, and butter were all we needed.
- Add a little water to the broccoli and cover it with a dome. That created steam while the steak continued cooking beside it.
- Move the steak to the side with its burner off to continue finishing. That freed up the hotter area and made use of the heat already in the plate.
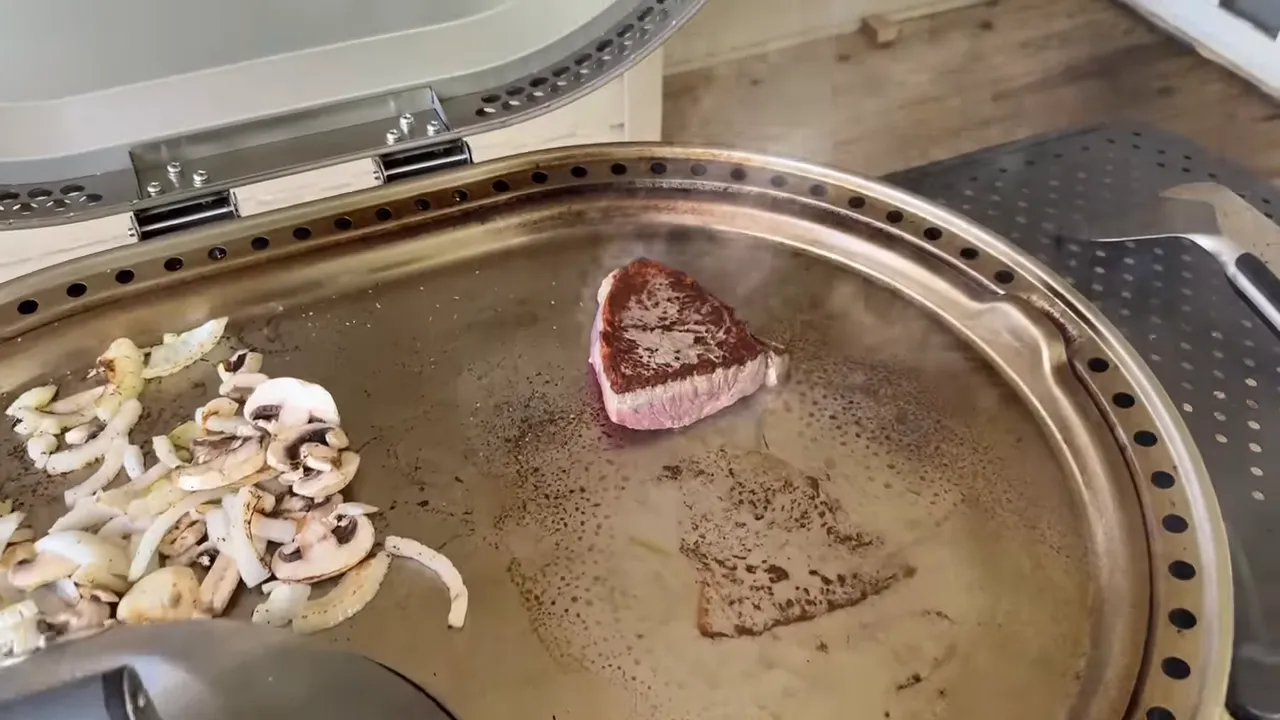
The low side was gentle enough that the butter melted slowly rather than immediately racing toward brown. Meanwhile, the steak developed a good crust on the hotter side. That’s the kind of range I want.
We finished with tender broccoli, sautéed mushrooms and onions, and sliced steak, then poured those buttery juices over the plate. Nothing complicated. Just a good dinner that showed why controllable heat matters.
Cleanup: A Little More Scrubbing, a Lot Less Seasoning Maintenance
Seasoning and rust are two of the most common griddle problems people ask me about. Different griddles, different storage conditions, different rust spots. We spend a lot of time helping people work through those issues.
One of my favorite things about this stainless steel top is that I don’t have to maintain a seasoned cooking layer or apply a protective coat of oil after every cleanup.
My cleanup has been straightforward:
- Use water and a scraper to loosen and remove cooking residue.
- Once the surface has cooled enough, use a scrubbing pad for the remaining buildup.
- Remove the loosened residue, wipe the surface clean and dry, and close the hood.
- Empty and clean the grease tray after it has cooled.
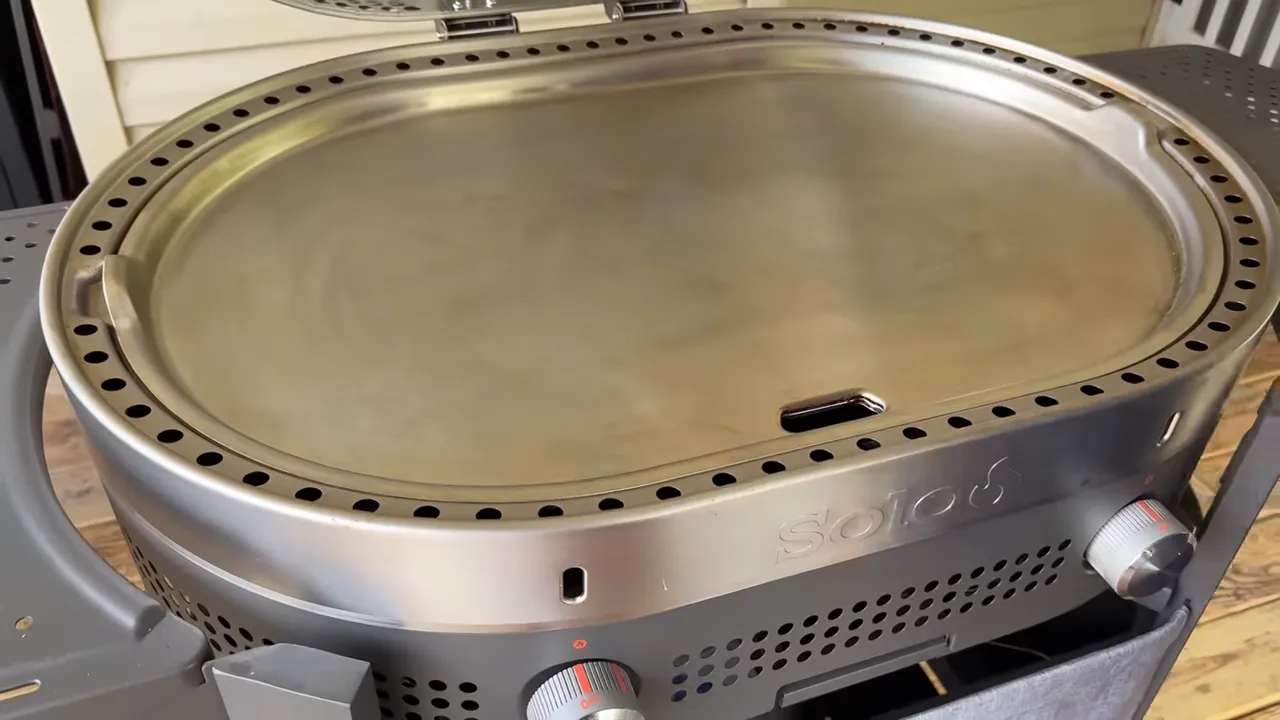
There is a trade-off. After a hard cook, getting stainless steel looking clean can take a little longer than a quick scrape of seasoned rolled steel. On rolled steel, a little leftover oil blends into the surface and helps protect it. Stainless shows what’s still there.
For me, that extra cleaning time is worth not having the same seasoning and protective-oiling routine. During this first month, I’ve been able to clean the Steelfire, set it aside while using other equipment, and come back without the maintenance concerns I’m used to managing.
Stand, Tabletop, and Taking It Somewhere
Solo’s approach to this griddle leans toward tabletop and built-in-style use. I specifically wanted to try the stand because easy movement matters so much in our setup, and mine will mostly stay on it.
The unit attaches to the stand with four screws, and its short legs are adjustable. That gives it flexibility beyond a permanent cart arrangement.
For transport, the cooking plate is the big consideration. That stainless steel plate is heavy. Once the griddle is completely cool, removing the plate before lifting the main unit makes the job much more manageable. I recommend separating heavy griddle tops from their bases when transporting them whenever the design allows.
Without the plate and cart shelves, the remaining unit feels surprisingly manageable. It makes me want to take it tailgating or bring it along for a weekend away.
That’s still something I’m looking forward to trying, not something I’m claiming to have already tested. But the design gives me a reason to make the trip happen.
My Verdict After a Month With the Solo Steelfire
The concerns I have are mostly around cleanup details and things that need more time: how that fabric panel holds up to outdoor mess, cleaning spills out of the perforated shelves, and the weight of the removable plate.
The cooking performance is a different story. I’ve been genuinely impressed.
- The low setting is genuinely useful. It doesn’t just give you a slightly less aggressive version of high.
- Heat distribution is excellent. The bread test backed up what we’d already experienced while cooking.
- The two burners provide meaningful control. I can sear on one side and work more gently on the other.
- The stainless steel surface has been easy to cook on. Food release was much better than I expected.
- The hood adds real cooking value. It isn’t just a cover for storage.
- Maintenance suits the way I use my equipment. A clean surface without a seasoning routine is a big advantage for me.
Is the Solo Steelfire the best griddle I’ve ever used? If it isn’t 1A, it’s absolutely in the conversation for 1B. That’s how much I’ve enjoyed it.
A month isn’t a long-term durability test, and I still want to put more meals and some travel time on it. But so far, Solo has nailed the things I care about most: even heat, real low-to-high control, and a cooking surface that makes me want to fire it up again.


